These days, it’s essential for hotel or property owners to build the online presence of their business. However, beautiful photos and detailed descriptions aren’t enough. You should allow your guest to book accommodations directly on the site. We’re going to tell you how to create a top-notch online hotel booking system in a matter of clicks.
This guide works for anyone related to the lodging business and developers who build a dedicated website. It’s based on a user-friendly service – BNBForms.
What is BNBForms?
BNBForms is a vacation rental software that helps you add any number of rental units, display real-time availability calendars, connect a channel manager, and enable online bookings.
BNBForms is a subscription-based service that doesn’t charge you or your guests any extra commissions. The only price you pay is $119 per year. You can create an account and test-drive all the features at no cost for one month.
No matter which platform you choose for your website, BNBForms is a versatile solution to manage your properties and bookings in an external account.
If you already have a website, you can start using BNBForms straight away. Otherwise, you must build a website on any preferable platform. Once it’s ready, get down to the BNBForms booking system.
On our blog, you can find in-depth tutorials on how to create a custom booking system regarding the CMS you use, including:
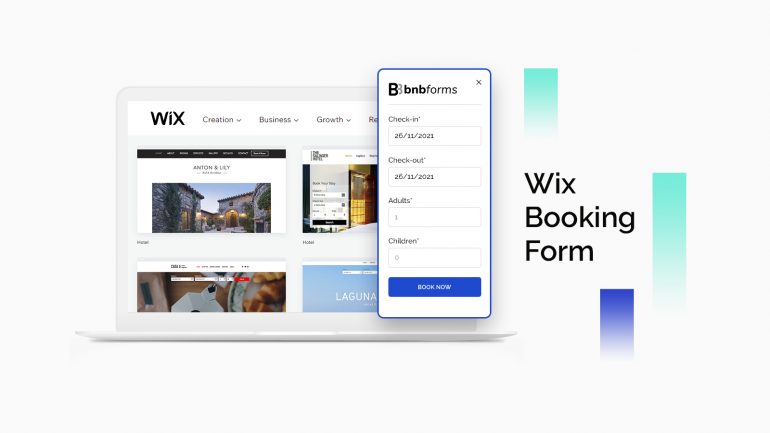
- Wix Booking System
- Squarespace Booking System
- WordPress Booking System
- Weebly Booking System
- Shopify Booking System
- GoDaddy Booking System
- Joomla Booking System
- Plain HTML Website Booking System
- PromoteMyPlace
And now, let’s get down to business!
How to create an online hotel booking system with BNBForms?
This guide covers only the main steps you come through while using BNBForms, as it’s a complicated task to include all the features this booking software provides you with.
Step 1: Set up your BNBForms account
Creating a BNBForms account takes a few simple steps:
1. Sign up with BNBForms.
2. Confirm your email address following the link in your inbox.
3. Log in to access your account using the credentials.
4. In the BNBForms dashboard, you’ll find pre-installed system pages and sample data for a few rental units. You can edit this data or delete it and add yours.
It’s worth mentioning that BNBForms is applied for daily-based bookings only.
Step 2: Add any number of rental properties
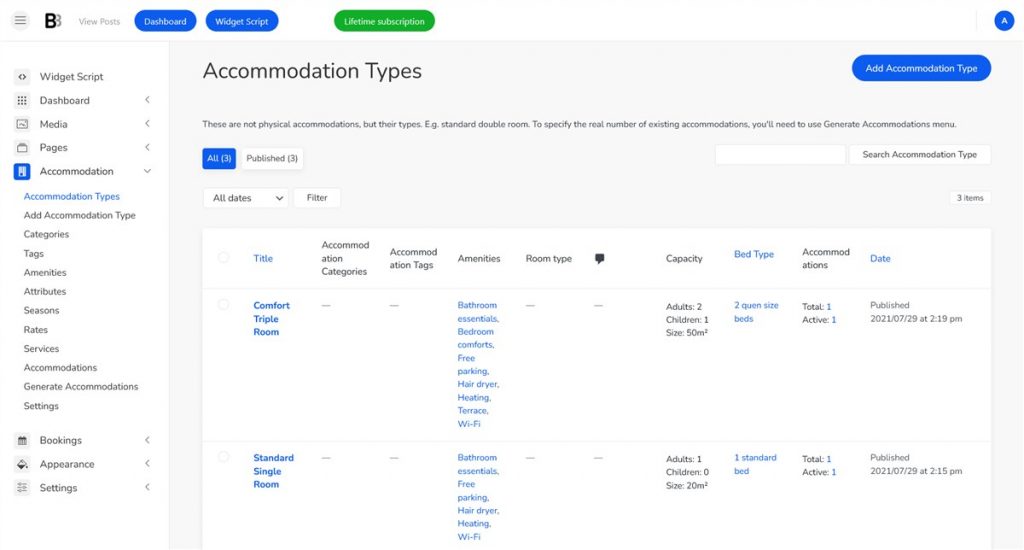
At this step, you can add the units you rent out to the dashboard and then continue with their text descriptions, photos, and more info. The data is displayed in a well-structured way so that guests can quickly view it on your website.
The details list may include accommodation category/ type, in-room amenities (bathroom essentials, Wi-Fi, etc.), bed type, room capacity, etc.
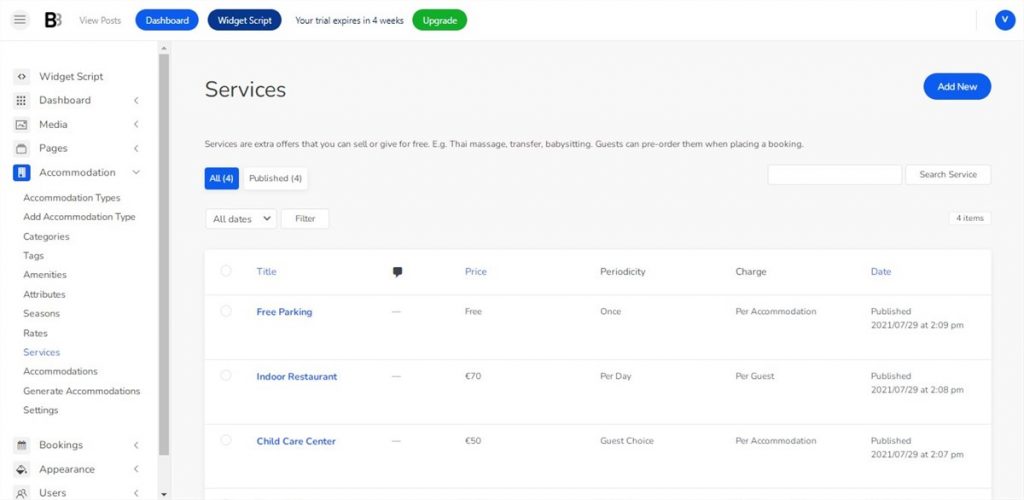
Also, BNBForms allows you to provide free & paid extra services or packages. For example, massage, car rental, indoor restaurant, etc.
💡 Discover: Best Vacation Rental Website Builders for Direct Bookings
Step 3: Specify seasons, rates, and prices
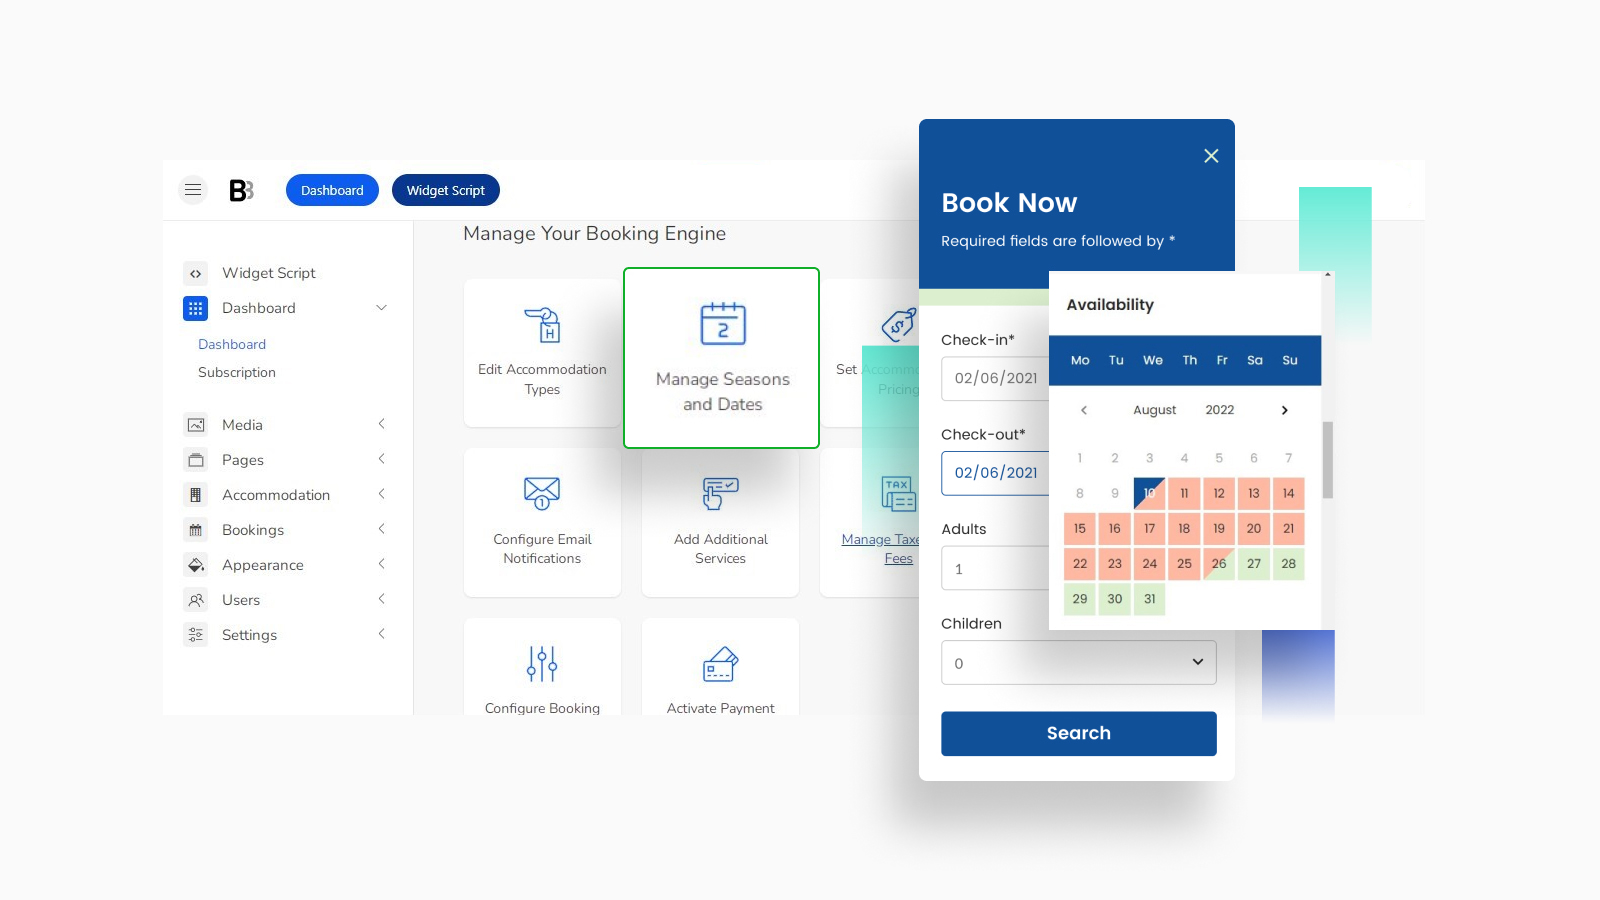
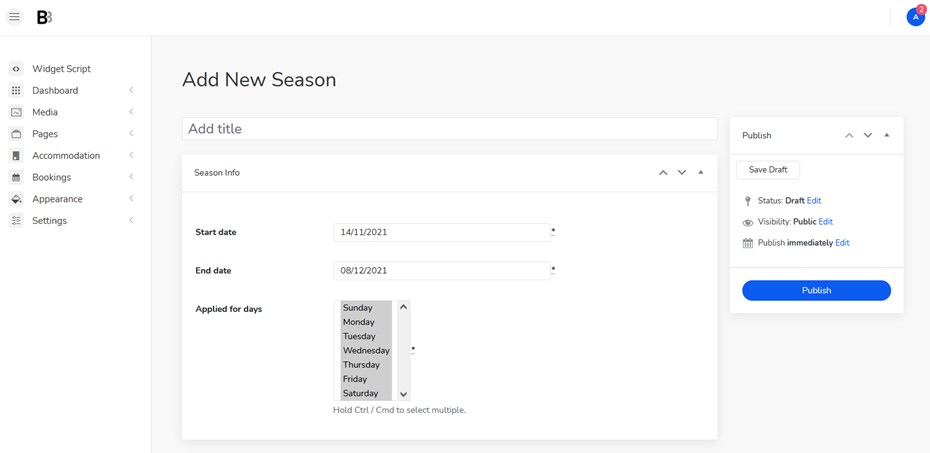
Before setting exact prices, you should create seasons in a dedicated menu. They are essential for establishing the line between prices. It can be the Christmas holidays, summer, or any other custom season.
In the ‘Rates’ menu, you get options to add the property’s pricing depending on the season, services that are not included in the property rate (e.g., breakfast), the number of guests (adults/children), and stay length.
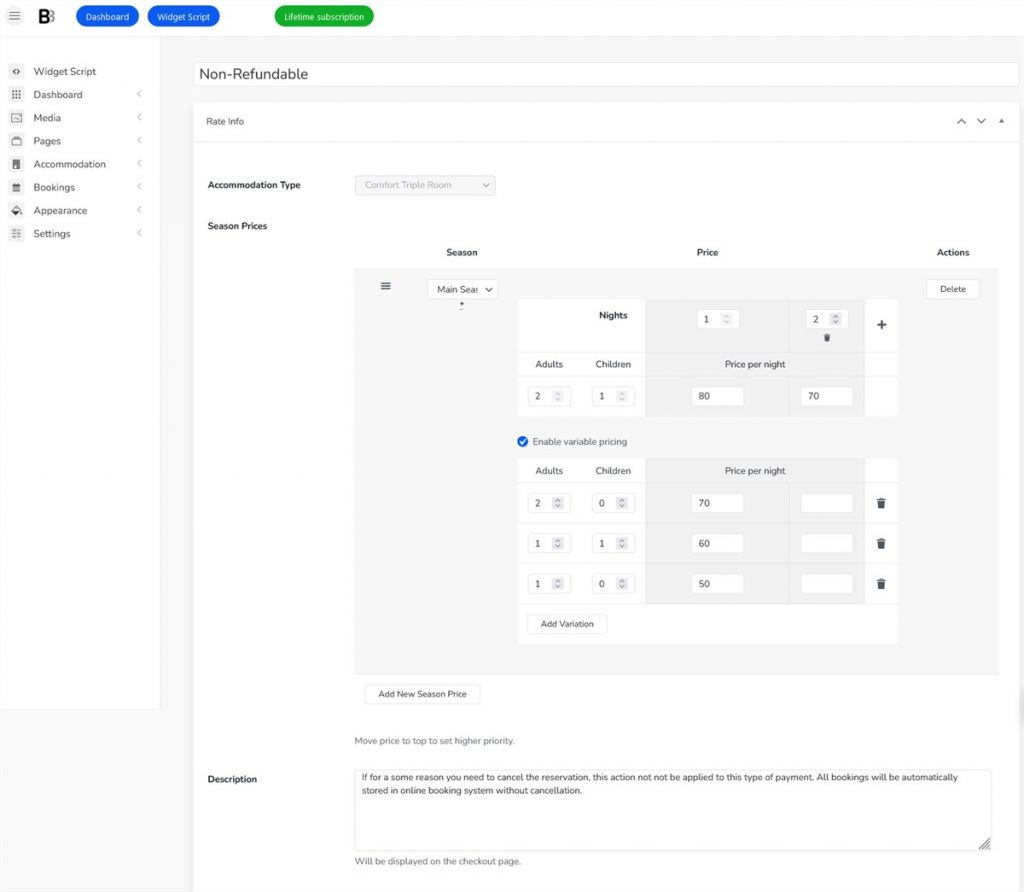
The pricing system lets you set regular base rates and dynamic discounts. With BNBForms, it’s easy to provide discounts for your guests via custom coupon codes.
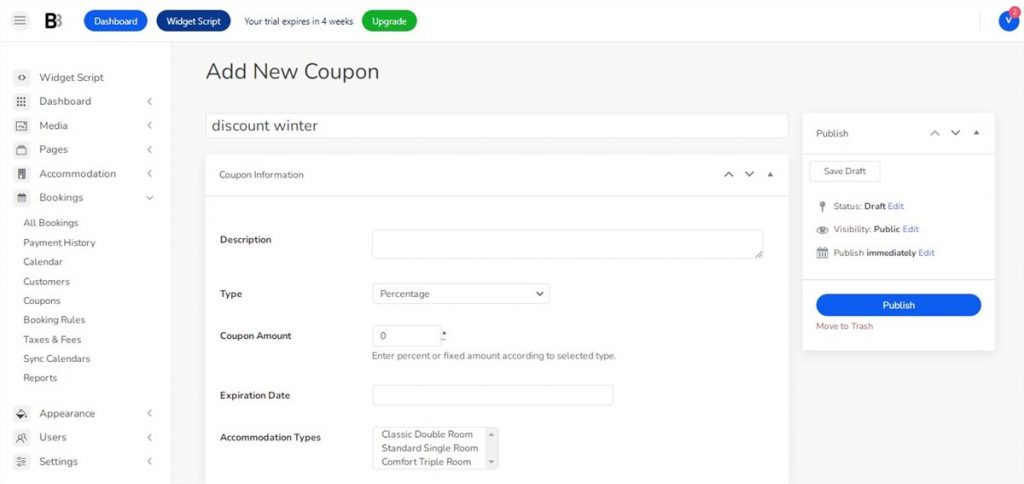
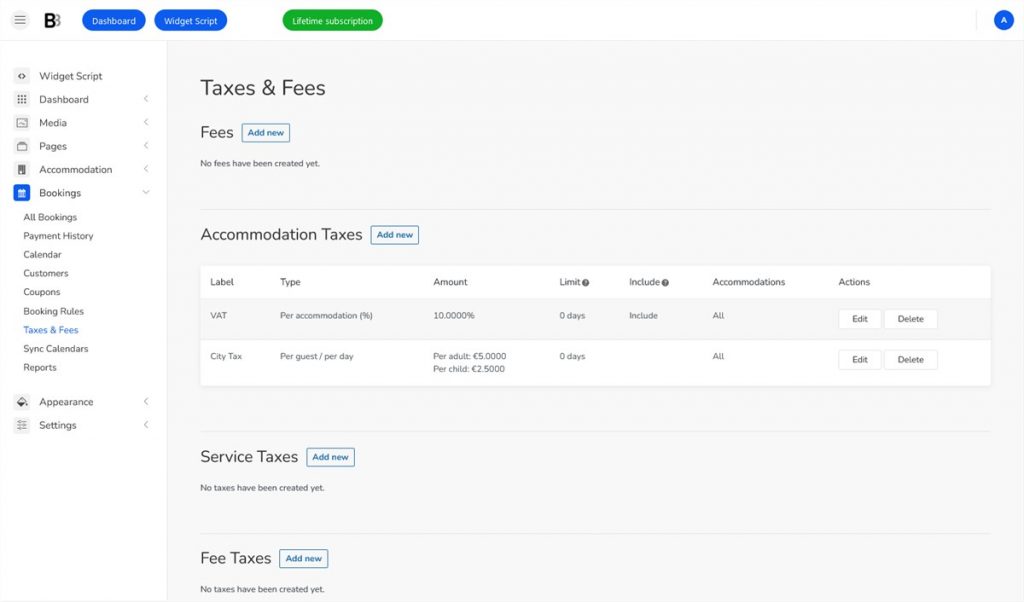
Step 4: Include taxes & fees in the final charge
Optionally, you can add taxes and fees to the property cost or show them on the property search page. Guests will see this information in the price breakdown table at the checkout.
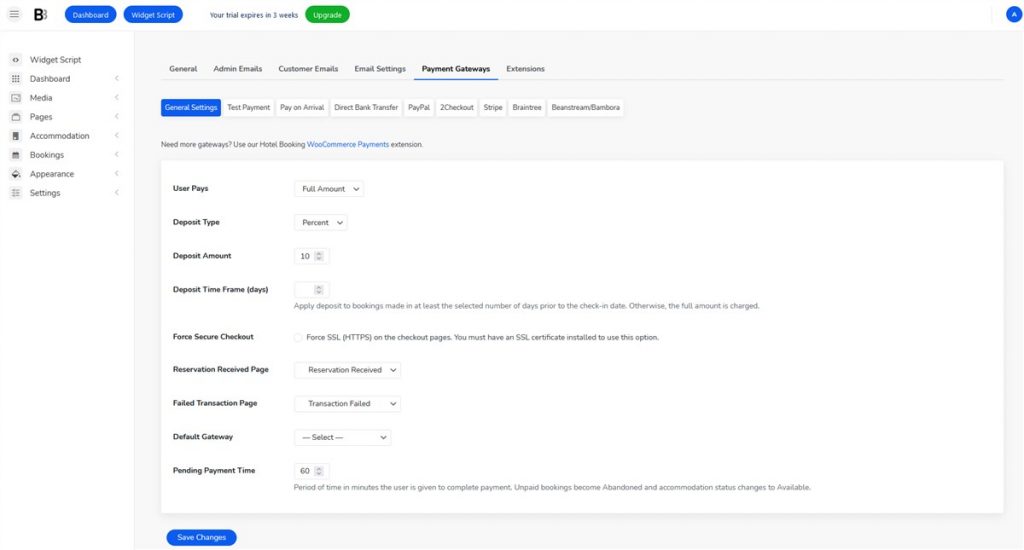
Step 5: Enable payments for your online hotel booking system
The BNBForms system gives you access to such payment gateways as Pay on Arrival, Direct Bank Transfer, PayPal, 2Checkout, Stripe, Braintree, and Beanstream/Bambora. There is also a Test Payment for you to test the payment processing options. You can set up all of them by clicking Accommodation > Settings > Payment Gateways.
Next, you can customize extra settings for each gateway in a couple of clicks.
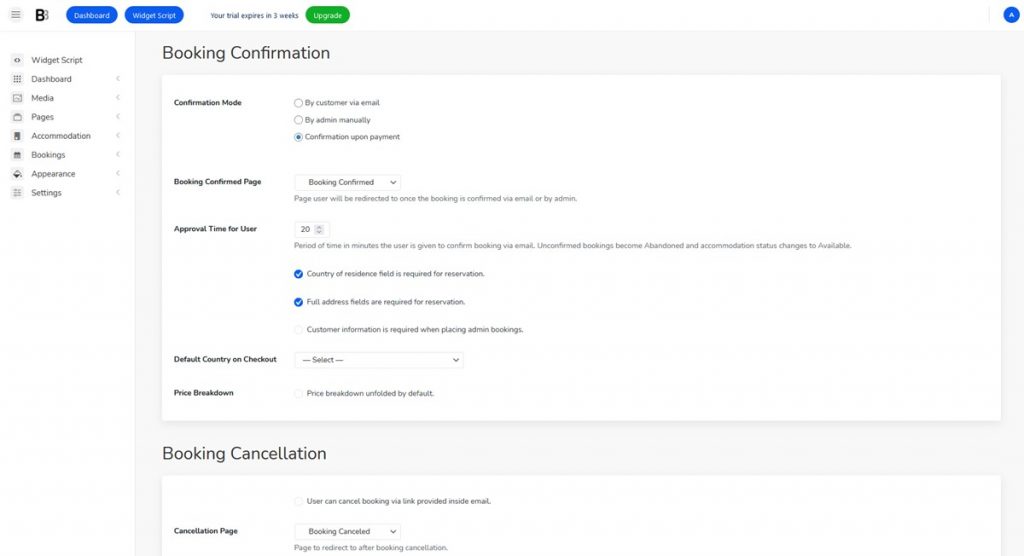
Step 6: Choose a confirmation mode and customize email templates
BNBForms offers customers three modes to confirm reservations received via the booking widget:
- Manual confirmation by admin.
- Confirmation via email by customer.
- Automatic confirmation upon payment (full or deposit, fixed or percentage).
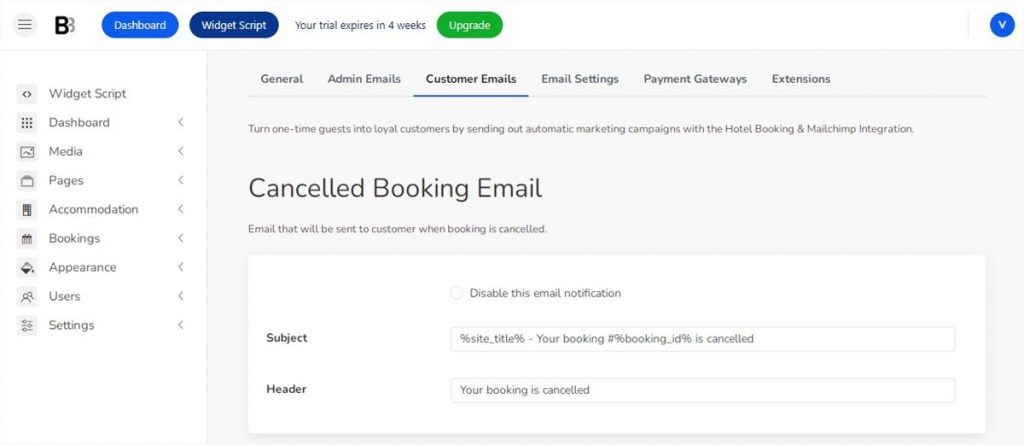
This rental software also features an advanced system of automated email notifications. The great thing about it is that you can use the default templates or create your own. Changing colors, text, email subject, and more details is easy.
Step 7: Connect your online hotel booking system to other platforms
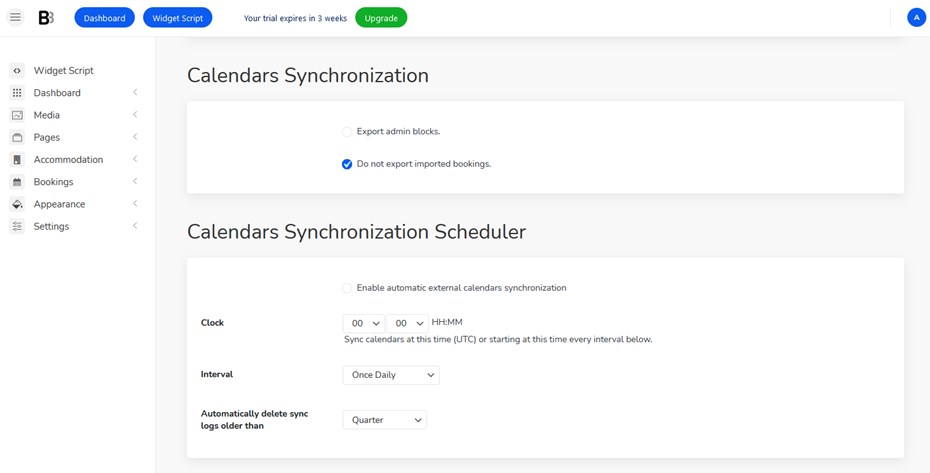
Synchronization with OTAs, or online travel agents (Booking.com, Airbnb, etc.), lets you have all the bookings centralized in one account. You’ll receive the information from multiple channels thanks to the iCal sync option. This way, you can keep track of your property availability without logging into different accounts.
Furthermore, connect Google and Apple calendar applications to get booking notifications right there.
At this step, you can set up the synchronization frequency (at least 15 minutes) and get your bookings synced in almost real-time.
Step 8: Set up booking rules, the search form fields, etc.
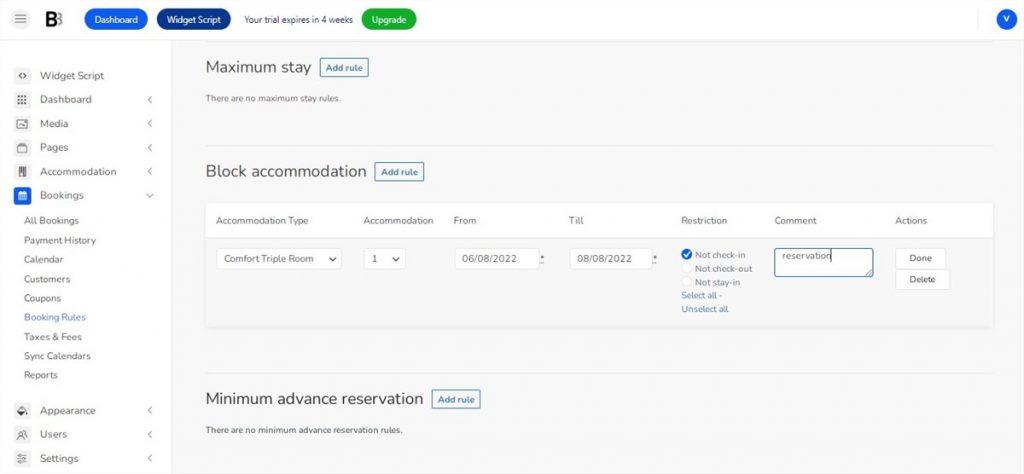
Go through the setting up of the main booking rules:
- Specify default arrival and departure period;
- Designate min and max stay-in days;
- Block accommodations from being reserved on particular days.
As for the search property form, you’re allowed to insert changes:
- Alter the age of children;
- Leave out the “Children” field;
- Remove any field (except for arrival and departure time);
- Add the “Guests” field label instead of “Adults”;
- Create as many custom fields as required.
Step 9: Manage bookings from the admin dashboard
BNBForms powers you with tools to easily manage bookings on the backend. You’ll be able to:
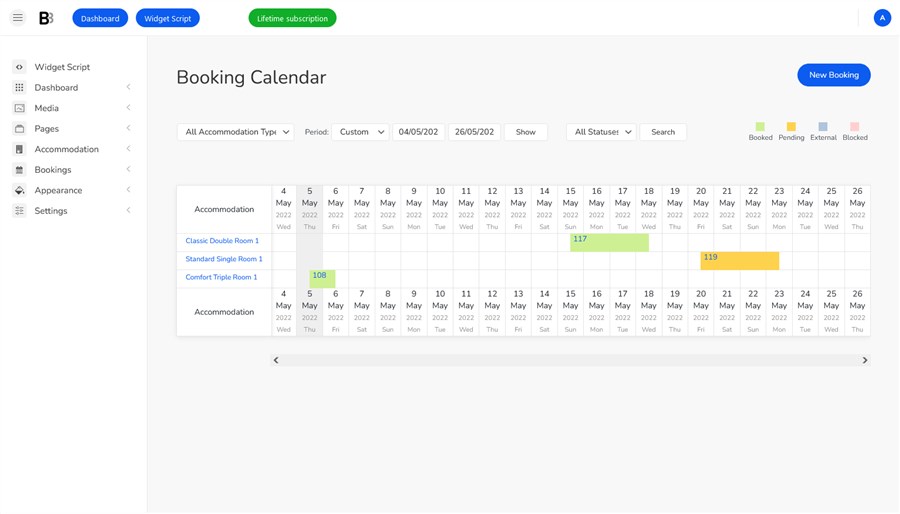
- View and search bookings in a centralized calendar by applying different filters;
- Check the payment details of every booking;
- Add new bookings via the BNBForms system manually.
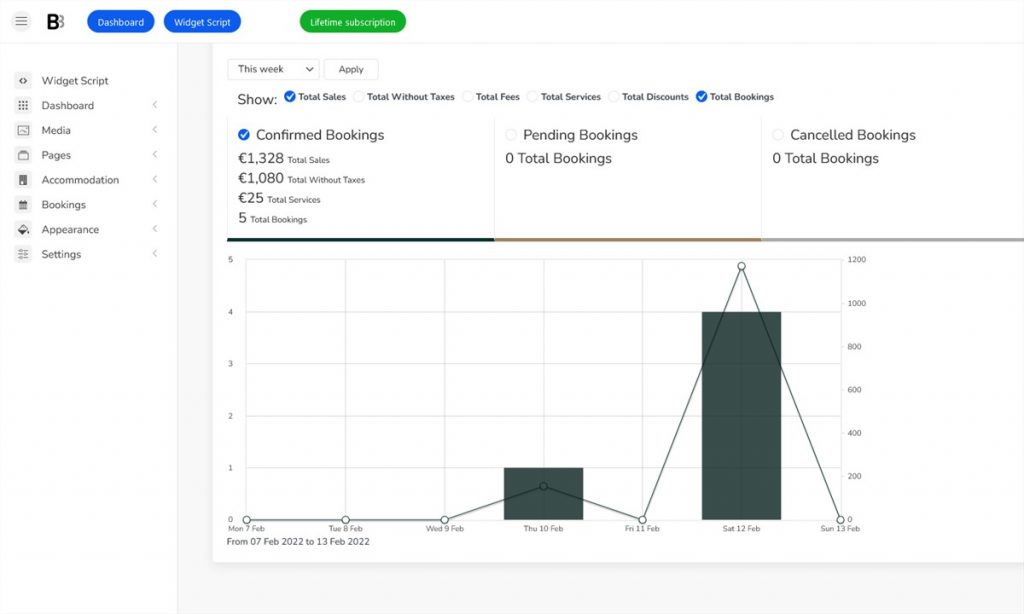
What’s great is that you can get insights via the ‘Reports’ menu. They help you track your earnings in a particular period. It’s possible to download stats in portable CSV formats and save them on any device.
Step 10: Add a BNBForms booking widget to your website
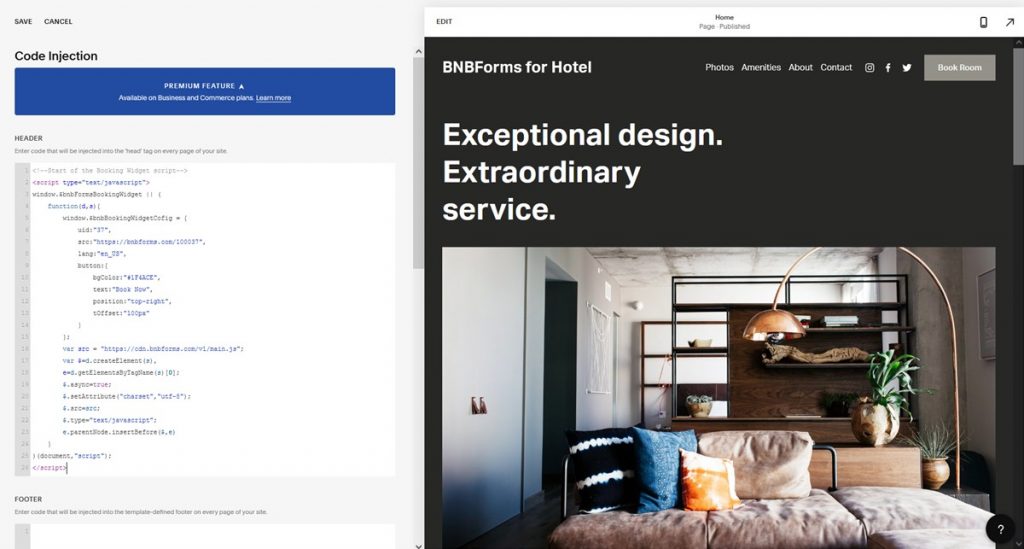
Finally, you are at the stage of generating a code to create an online hotel booking system from scratch. All the settings are set up – it’s high time to copy and paste this code to the required site section. As a result, you get a mobile-friendly widget with a “Book Now” button.
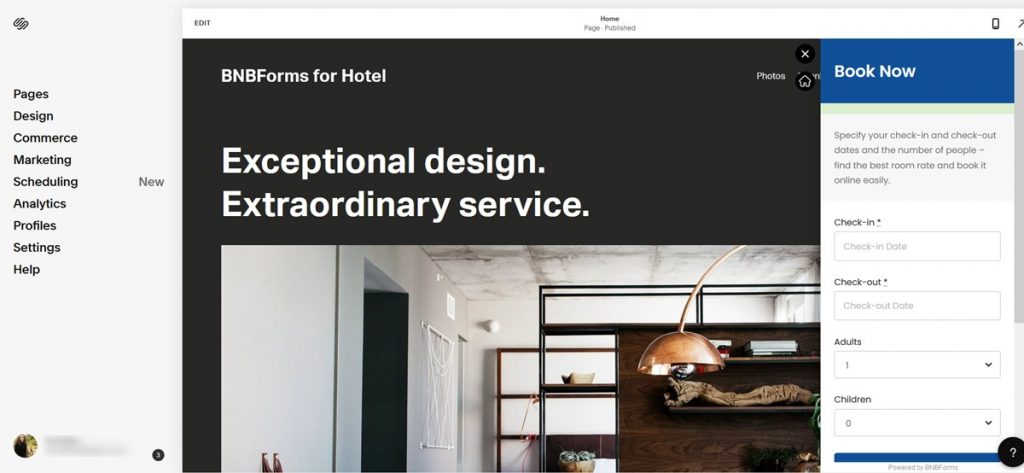
By the way, you are free to customize colors in the booking widget by BNBForms so that it meets your needs.
Conclusion: How to create a perfect online hotel booking system?
Integrating booking options to your hotel booking website with BNBForms, you can create a fully-fledged system for any kind of rental property (hotel rooms, holiday homes, B&Bs, trailers, campsites, etc.) and a simple hotel reservation form. This software smoothens the process of direct bookings and ensures a great user experience. There are no limitations on the number of properties and bookings you can have with BNBForms.
Feel free to visit a demo page to check how the BNBForms booking widget looks on any website. And if you like it, start your trial for free!
