BNBForms, dedicated to the lodging business of different scales, allows hotel and vacation rental owners to create and customize a powerful accommodation booking widget. It can be then placed into any website no matter its CMS (WordPress, Wix, Squarespace, plain HTML, etc.) without requiring any tech skill from property owners and used as a hotel booking system.
This makes the platform a truly human-friendly tool for launching and running a powerful booking engine, accepting reservations and syncing them to all the rest of possible bookings from third-party platforms (e.g. Booking.com).
BNBForms includes a booking widget builder, property manager software, booking software, channel manager, and payment processing.
Thus, BNBForms provides an account (which you can test drive for free for a month, needless to say), wherein you are free to set up a booking form online and later collect and track all the bookings.
Free download resources and tutorials for you:
- Hotel Booking Confirmation Email Templates
- Download Free Hotel Booklet Templates for Print
- How to Create an Early Bird Promotion for Hotel
BNBForms vacation rental software: Getting started
Follow these steps to create your free BNBForms hotel booking form account:
- Sign up with BNBForms (it’s free, no credit card details required until you’re ready to upgrade).
- Confirm your registration by clicking on the link in your email inbox.
- Log in to your BNBForms with the login and password you received.
- You’re in the right place!
The system has already set up some of the key pages and settings that you can easily personalize.
The key dashboard menus and sections we’ll try to describe in what follows.
Also read in-detail guides:
How to Add a Booking Form on Wix Hotel Websites
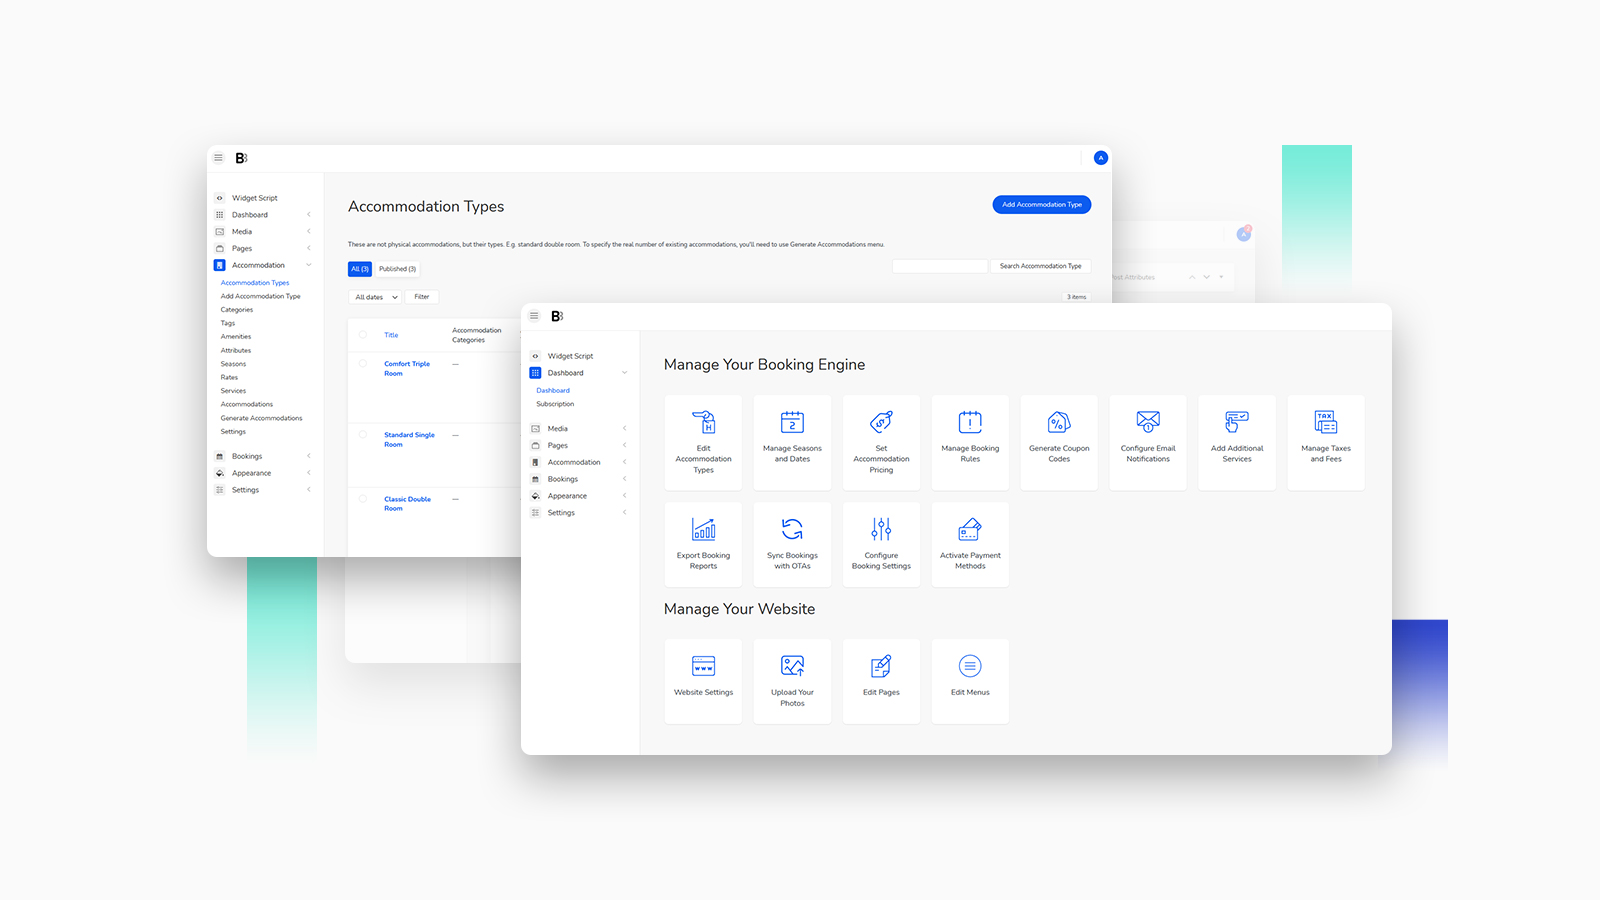
Once you’ve logged in, there are three key logical sections in the dashboard:
- The booking engine: Accommodation and Bookings
- Customization settings: Media, Pages, Appearance, Settings
- Widget script: for the final stage of embedding your booking form script into any site page
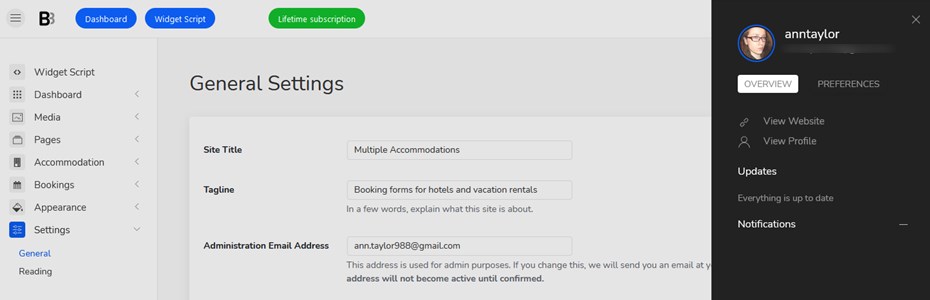
Also, there are account settings from the right, where you can configure your profile settings, website notifications and updates. Switching to the Preferences tab, you can switch your dashboard to the light or dark mode, show or hide the menu buttons by default, and show or hide the screen options.
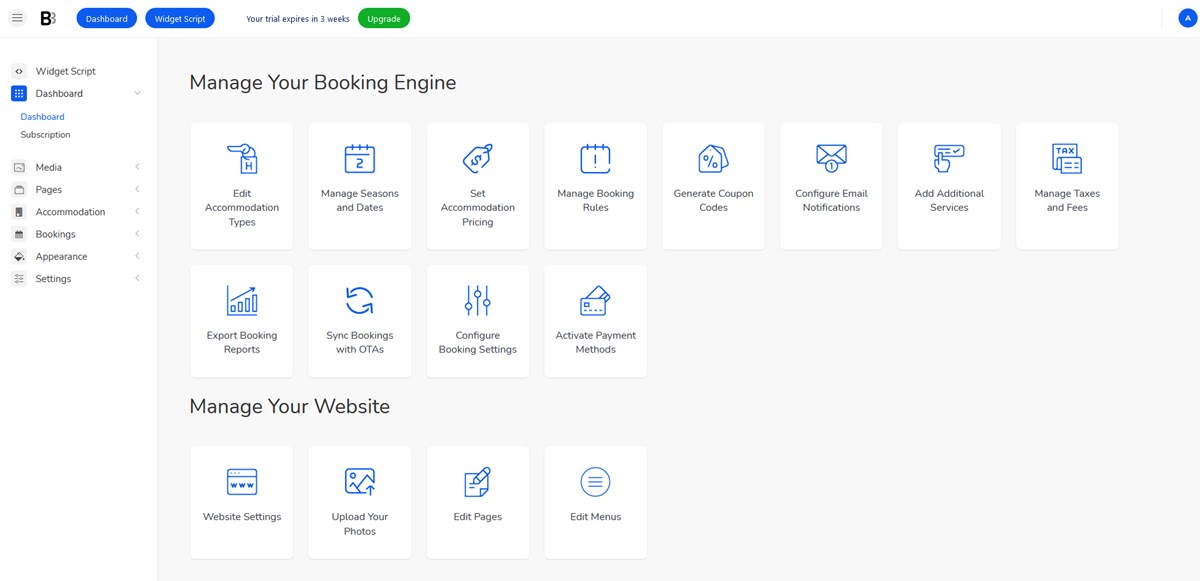
The Dashboard menu merges the vacation rental booking engine and the site settings into one screen that walks you through the main settings. And in this post, we’ll try to shed some light on each of them.
Manage your booking engine menu
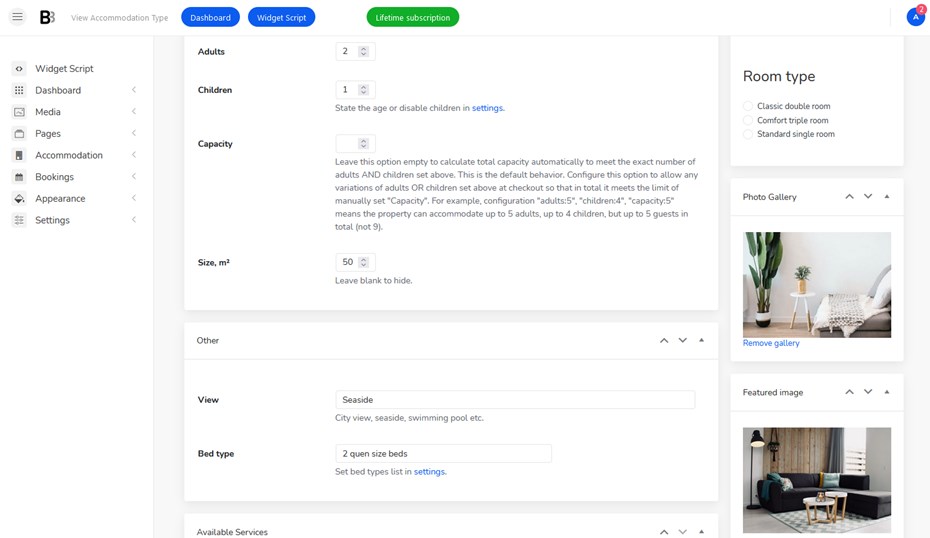
Edit Accommodation types
By default, the BNBForms system generates sample accommodations that you can edit or delete. You are free to create as many accommodation types as needed here. Each property can contain such essential information as capacity, amenities, size, bed types, extras available with the room/home.
There is no extra commission on the number of properties you have. It’s always one fixed service price.
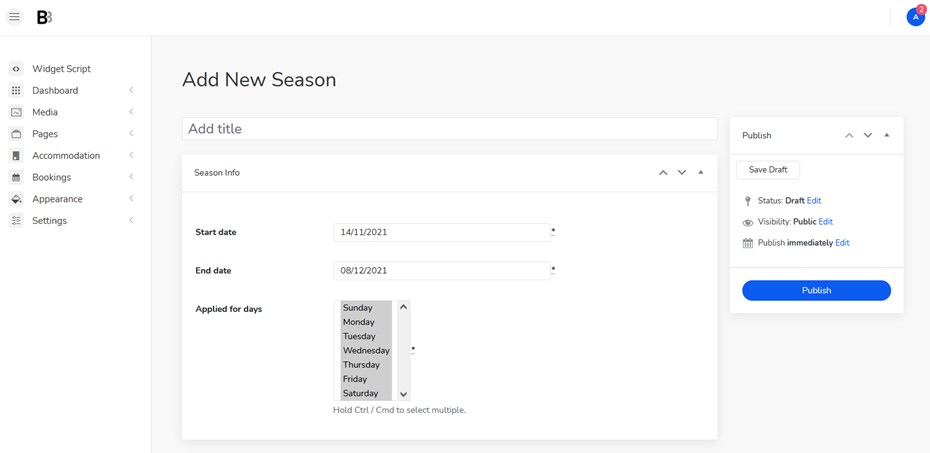
Add seasonal ranges
There is a menu where you can add all the range of periods when the prices must change. Later you’ll need to assign flexible rates to these seasons.
Set accommodation prices
In this menu, you need to add rates that in their turn can differ based on:
- The number of people
- The length of stay
- Amenities and extra services available for the room
- Custom discounts (if available)
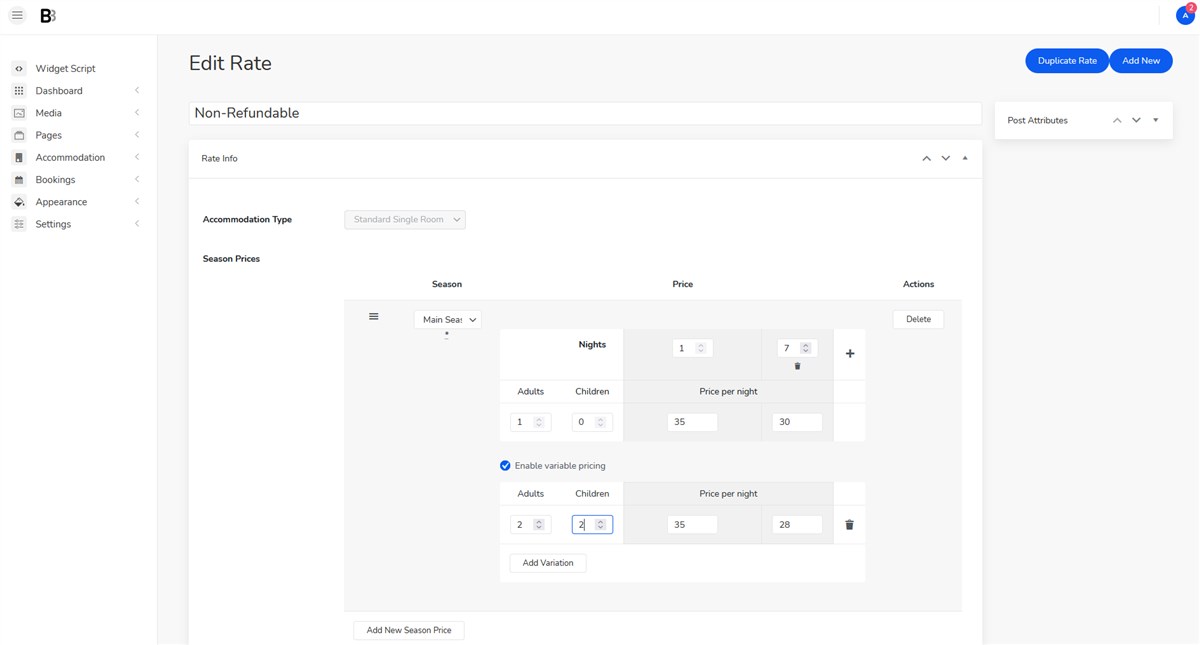
As you see, all these rates will apply automatically depending on the arrival and departure date preferences of your guests.
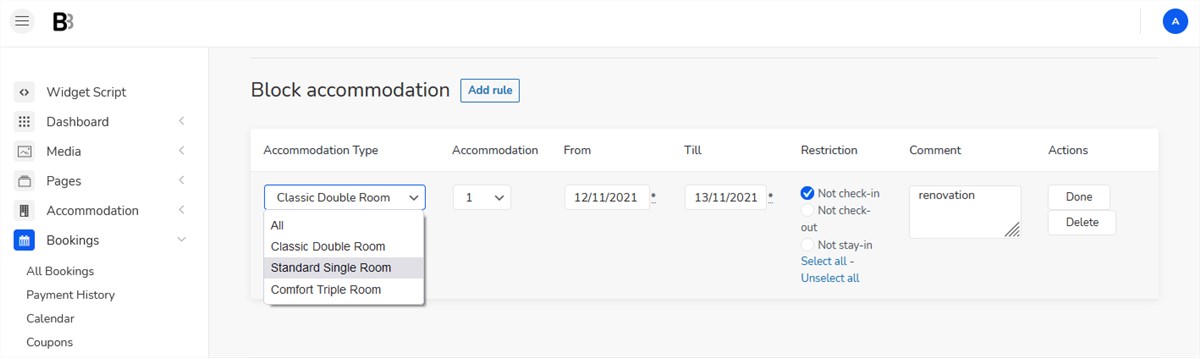
Manage booking rules
Here you can go through the main rules of available check-in and check-out days, minimum and maximum stay-in days, or even completely take properties out of booking.

Also, you can set the number of days prior to which guests can make a booking. To better automate the process of making some properties automatically unavailable, you can also add buffer times, which is an extra time added to the already booked dates (confirmed reservations). The latter might help you get some more time to sanitize and clean the room.
Most of the rules you can apply individually to properties, seasons or chosen dates:
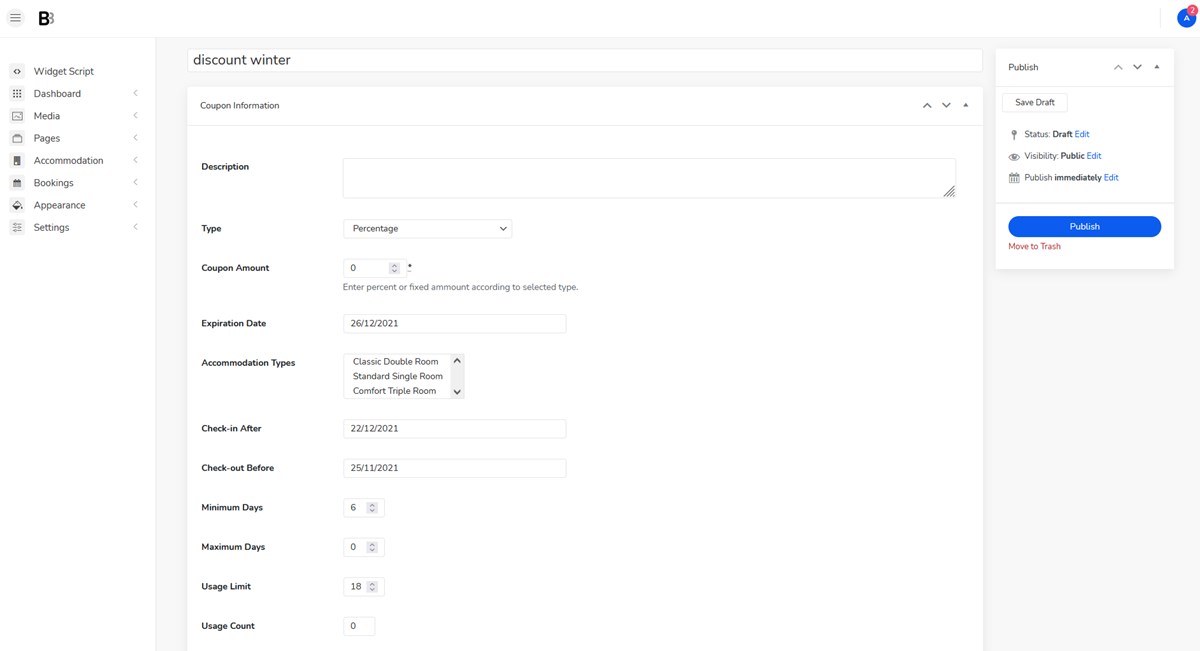
Generate coupon codes
BNBForms makes it easy to create custom coupons according to multiple rules and either give these discounts to individual guests or feature codes somewhere on your site in terms of promo campaigns.
It can be a specific percentage, fixed per accommodation per stay, or fixed per accommodation per day. You can also designate its expiration date and limit the number of usages.
Configure email notifications
Whether the property reservation is placed, canceled or confirmed, there are individual email notifications for them. you can completely alter them in this menu, add or remove automated data pieces.
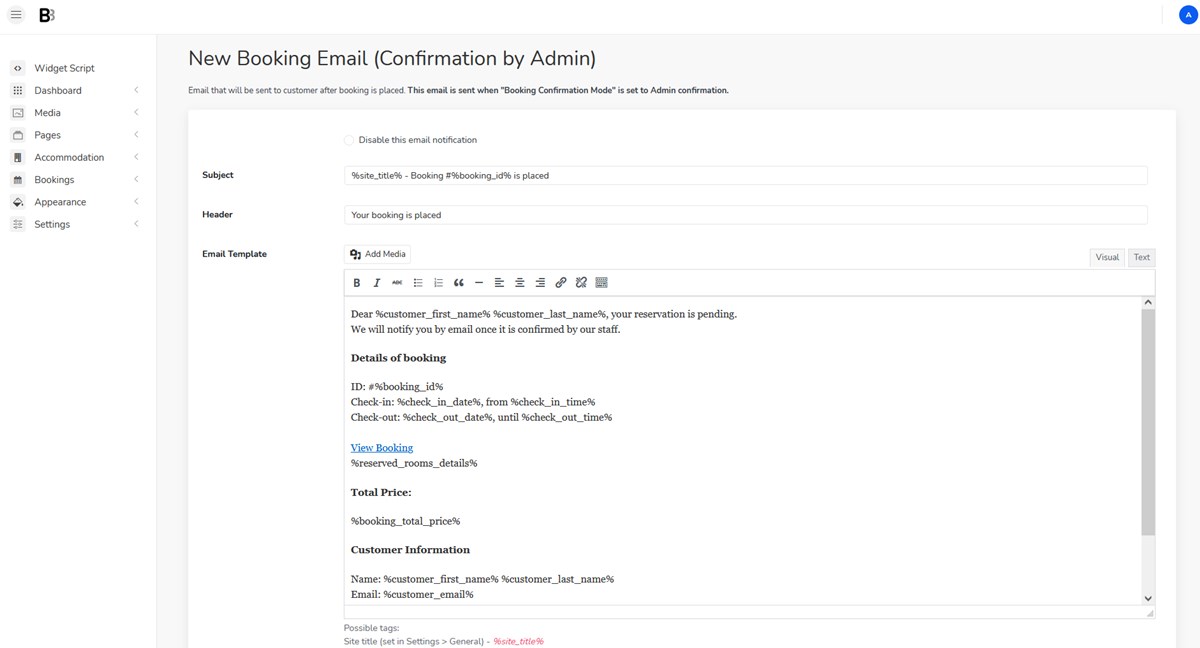
Switching to the Email Settings tab in this menu, you can also brand your emails by changing colors, uploading your logo, adding footer text and more. Of course, you’ll find here email templates for both admins and customers.
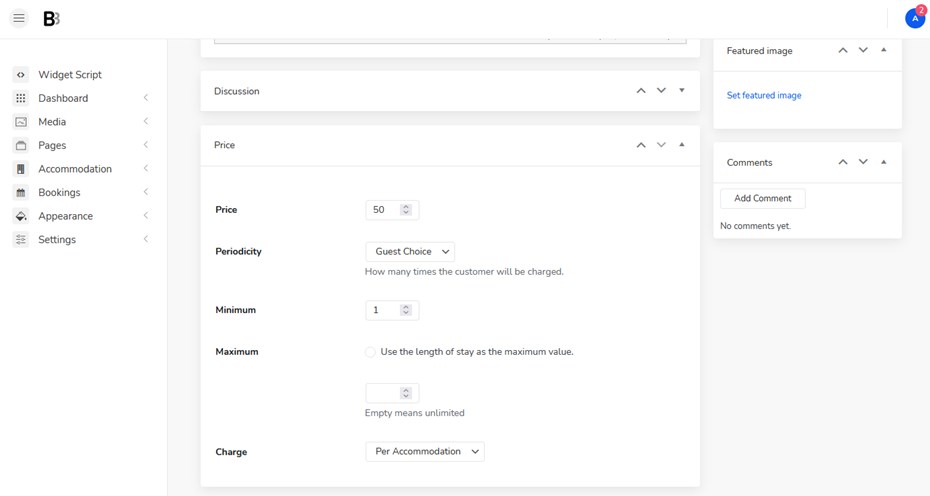
Add additional services
This menu is for free or chargeable extras that guests can add at checkout to their reservation. For each of them, you can set the price, charging periodicity, as well as to charge per guest or per accommodation.
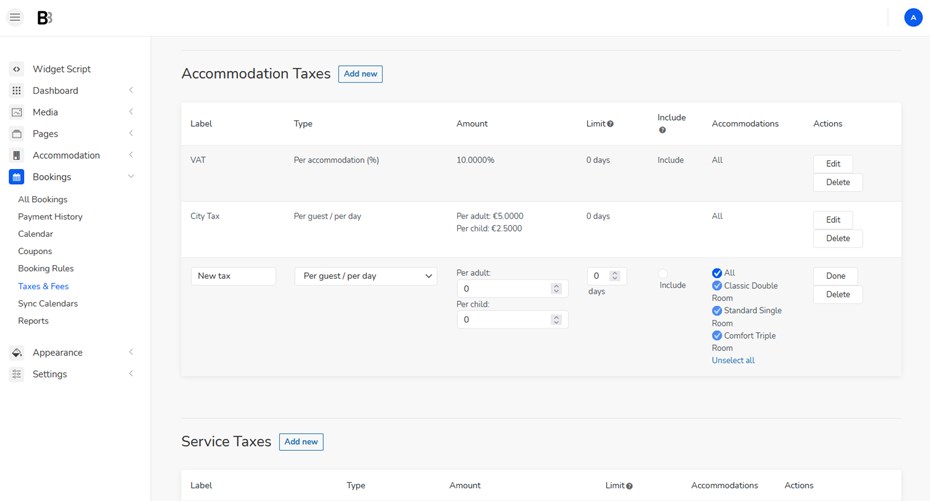
Manage taxes and fees
This menu is for adding extra charges you can impose on the price of a booking. You can create different types of taxes and fees and decide whether to show them included into the property price or stated separately.
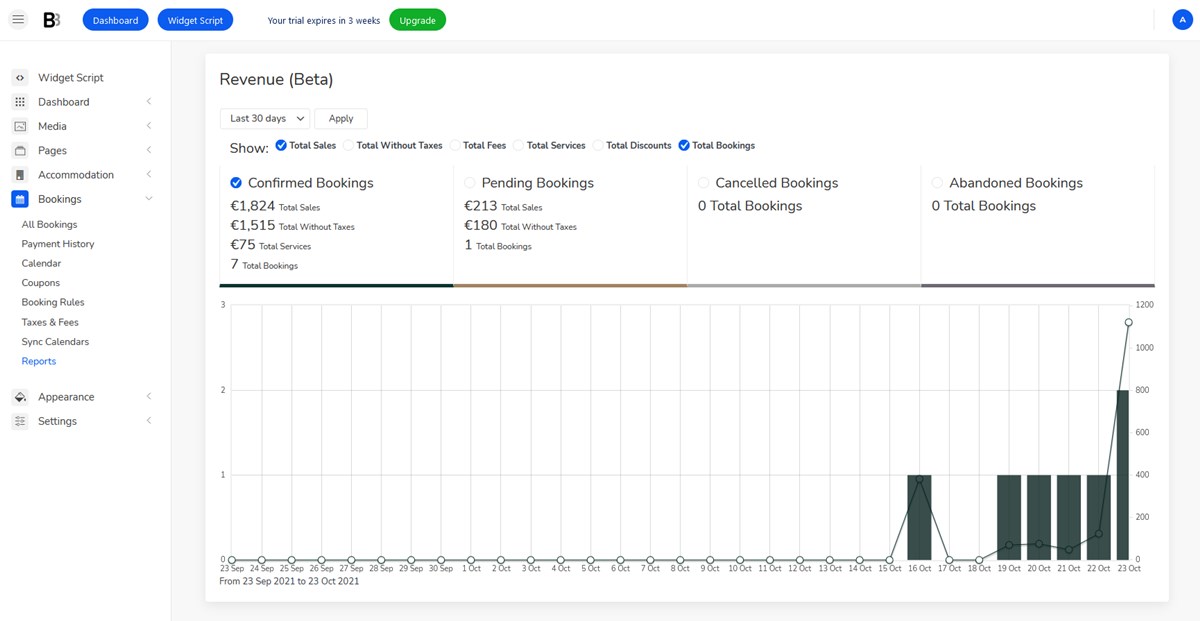
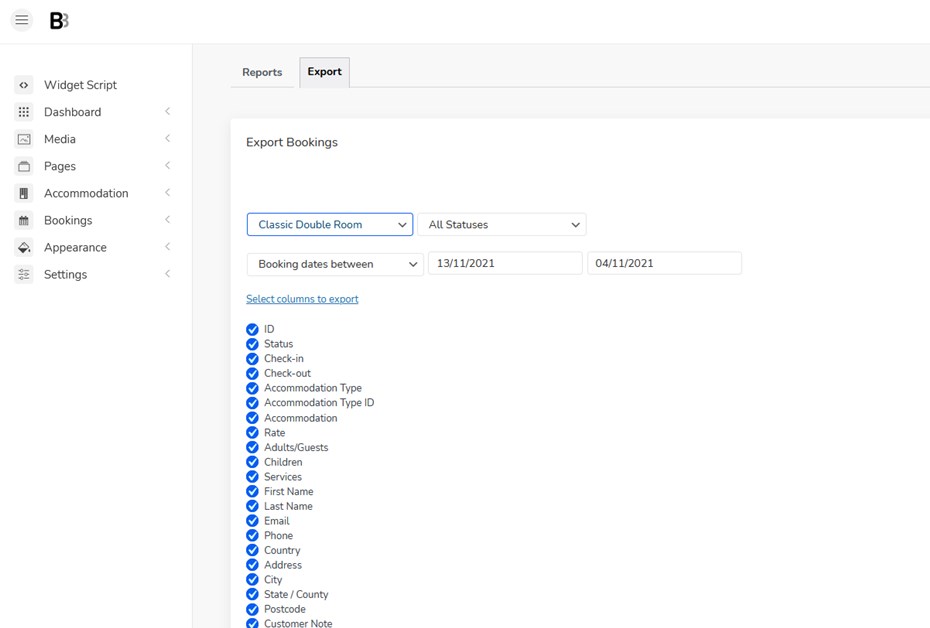
Export booking reports
This dashboard encompasses two tabs – in the Reports tab you can see all the revenue stats, how much you’ve earned and how many bookings were made.
In the Export menu, you can download all the data on booking in a CSV document.
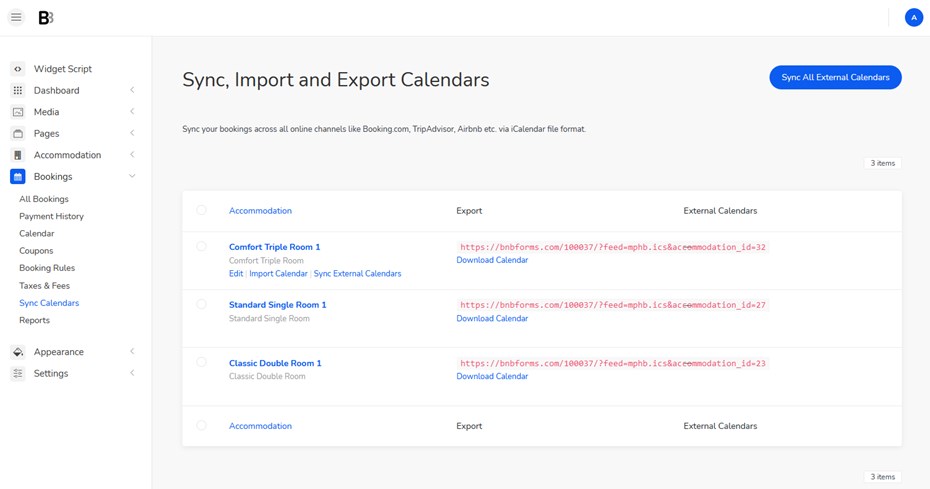
Sync bookings with OTAs
You can sync, import and export calendars from external platforms, such as Airbnb or Booking.com. This will help you have all your bookings under one BNBForms roof and never get double bookings.
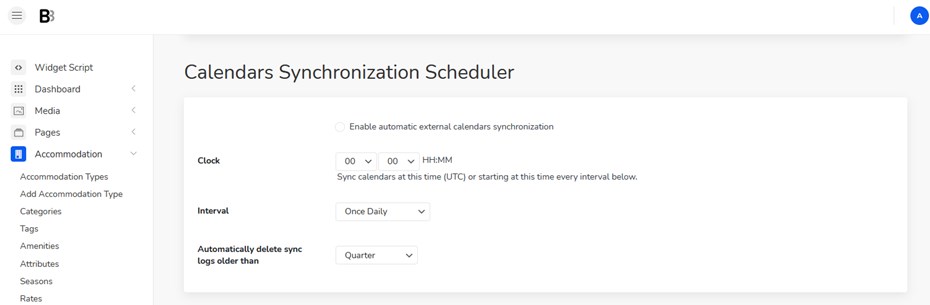
Navigating to the calendar synchronization scheduler via Accommodation > Settings, you can also designate how often the sync must be performed.
Configure booking settings
Here you can find quite an extensive list of tools that you can personalize. For the bird’s-eye view, let’s list semantic groups of settings:
- System pages (must be pre-installed automatically) that are endpoints of all tasks performed via the booking widget
- Booking confirmation modes (automatically or upon payment)
- Booking cancelation settings
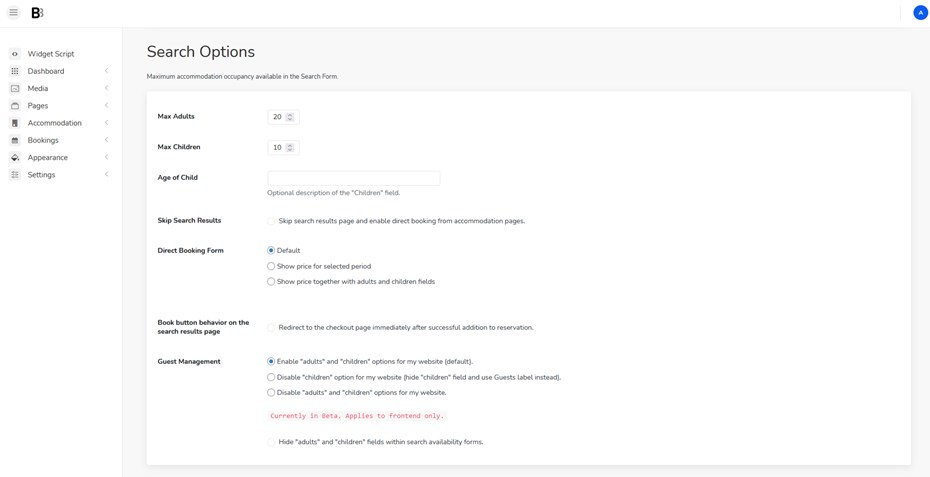
- Property search form settings (e.g. default fields, field labels)
- Currency, bed types, units of measurement
- Calendar styling and colors
- Channel manager settings
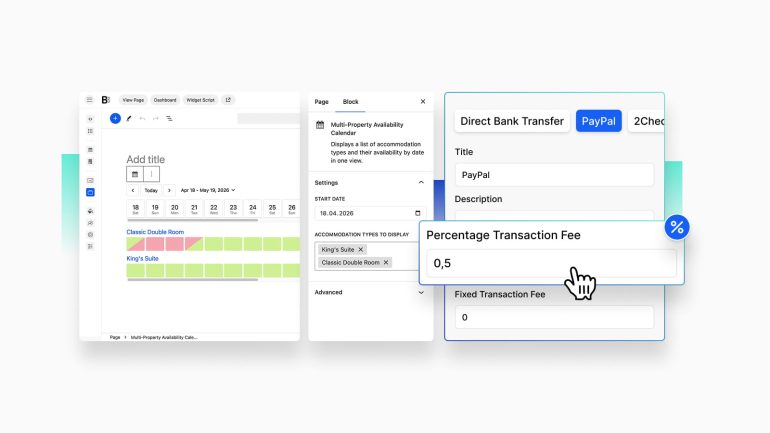
Activate payment methods
If you want to accept online payments, here you can enable popular payment methods, including PayPal, 2checkout, Stripe and more. Or it’s also possible to use Pay on Arrival or Direct Bank Transfer methods.

You’ll also need to go through some key settings, e.g. decide whether a guest needs to pay the whole sum or just a deposit; and if it’s the latter, whether it will be a percentage or monetary value.
Manage your website menu
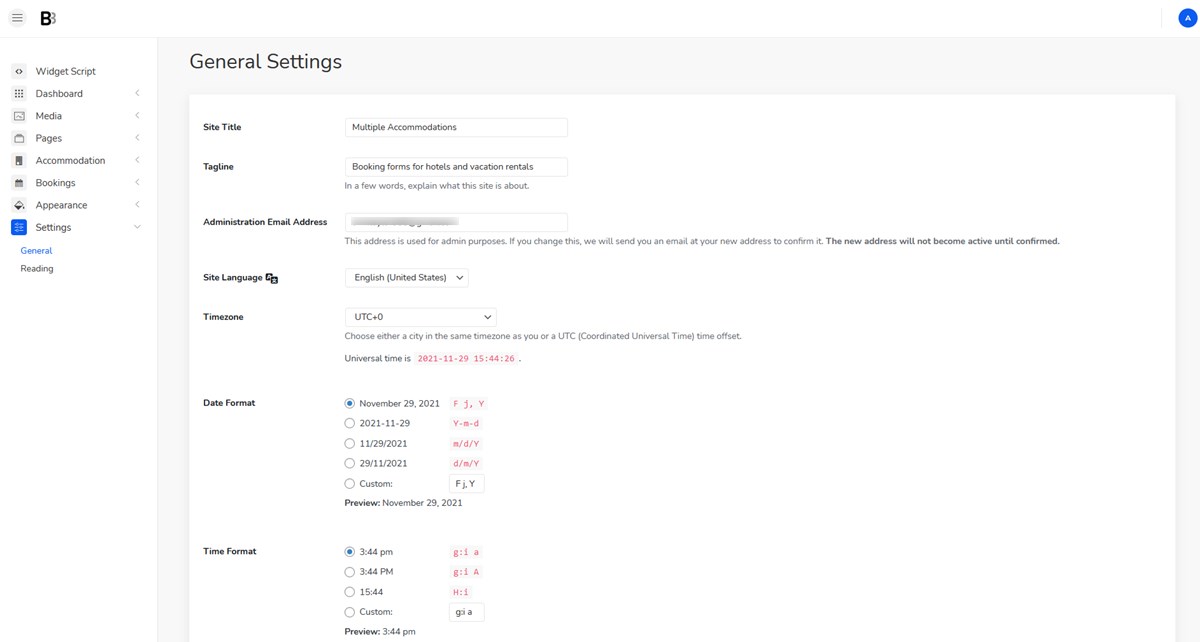
This menu allows you to go through the booking form styling and settings and general configuration of your BNBForms dashboard. Those include:
- General settings (language, timezone, etc.)
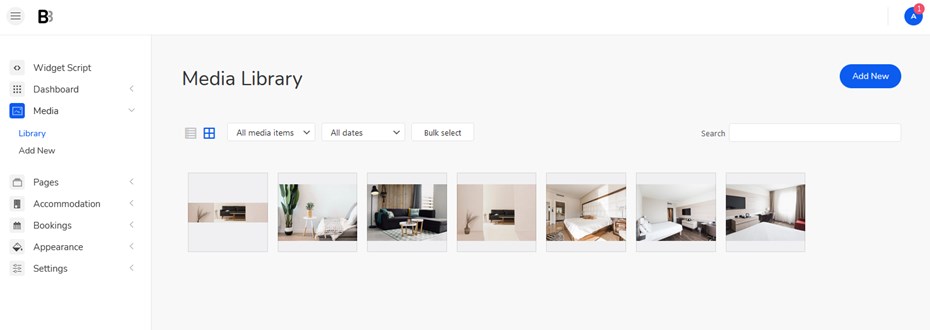
- Media Library stores accommodation and service photos you uploaded (guests will see them in search results using your hotel booking form online)
- Edit menus and edit pages
- In the Appearance menu, you can also add background images to your form and do a few more customization tweaks.
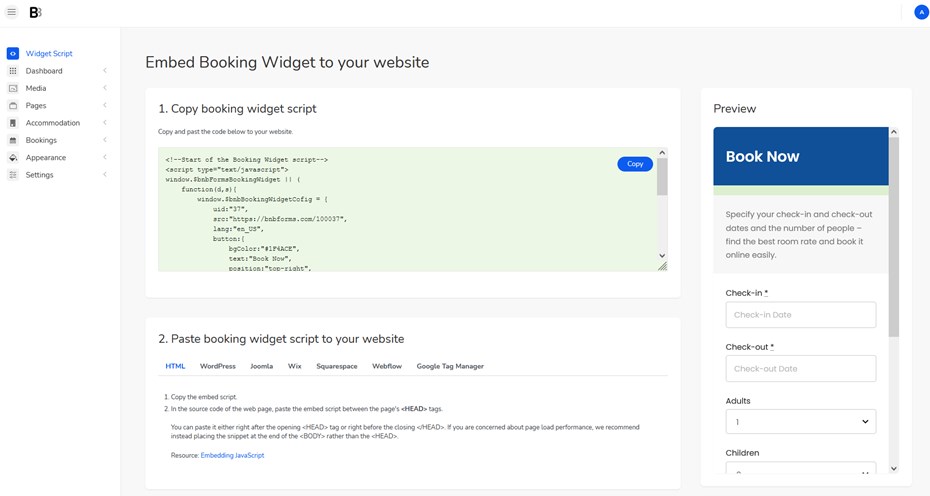
Widget script menu for the hotel booking form
In this menu, you can get the booking widget script, which is generated according to all your settings. You simply need to copy it and paste it to the preferable part of your website. For example, here we explain how to do it:
Create a Hotel Booking System from Scratch: Embed a Code
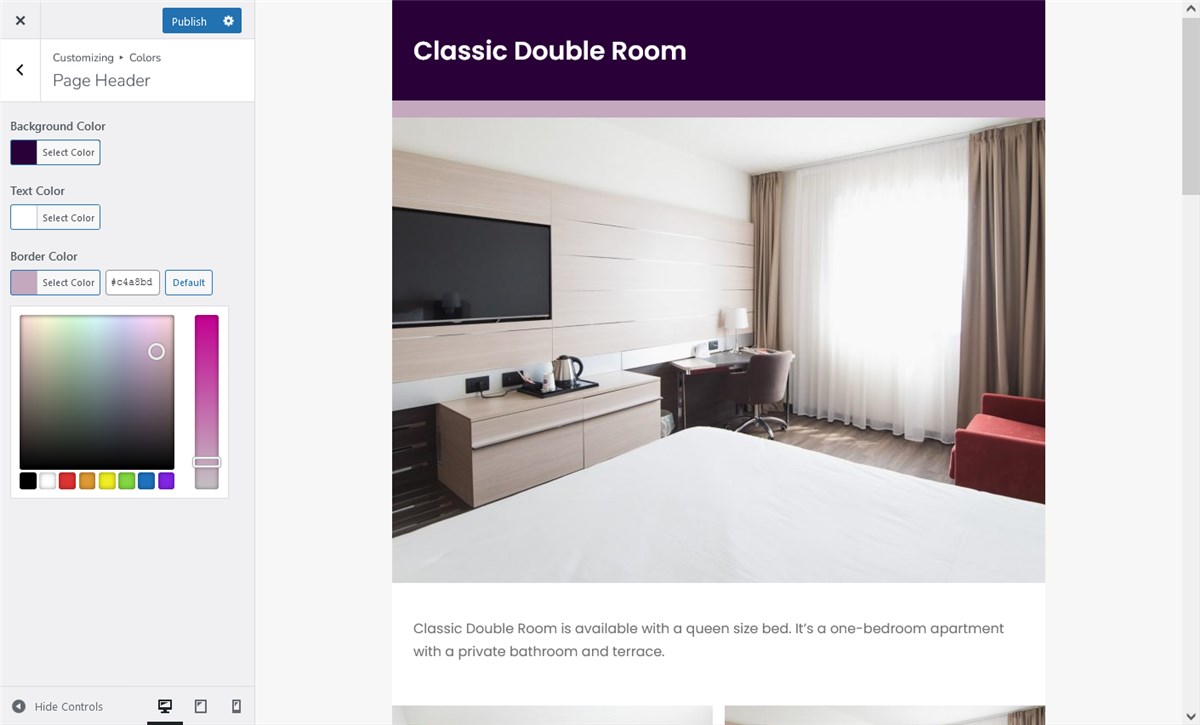
Via the Appearance menu, you can also update all accent colors of the booking widget, availability calendar and other parts of the booking widget to find a better match for your site’s overall design.
Find it via: Appearance > Customize > Colors. Read more about how to do that in this booking widget colors post. Customize colors before you generate the widget script.
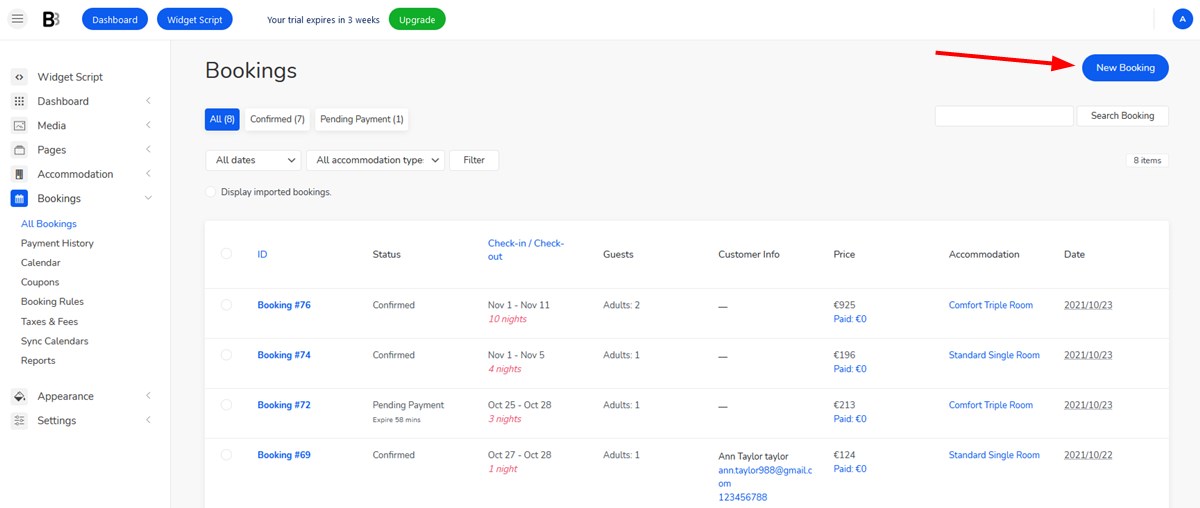
Bookings menu
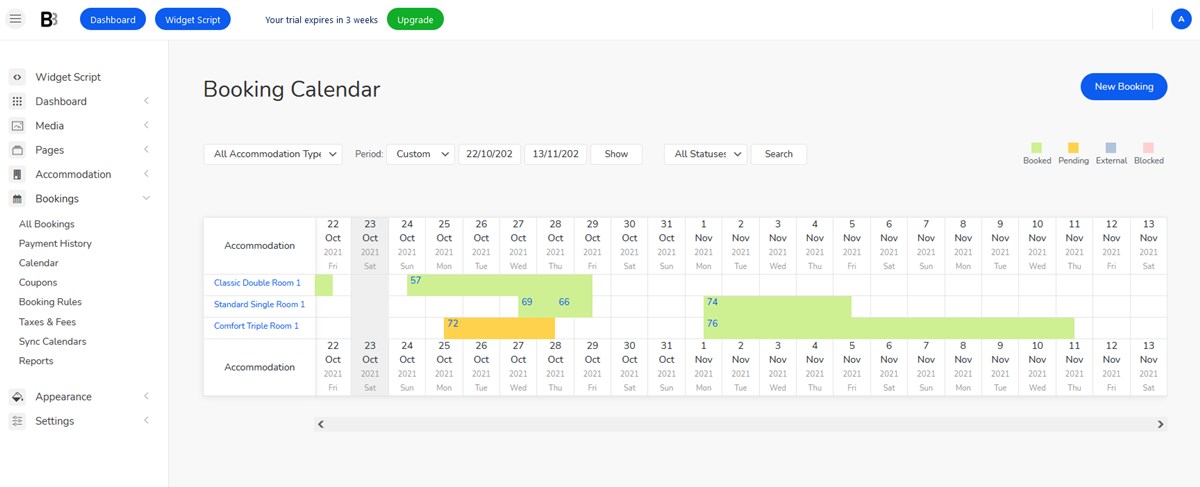
This is for the bookings management and stats.
You can view bookings in a handy calendar, sort bookings by statuses, view client details and more.
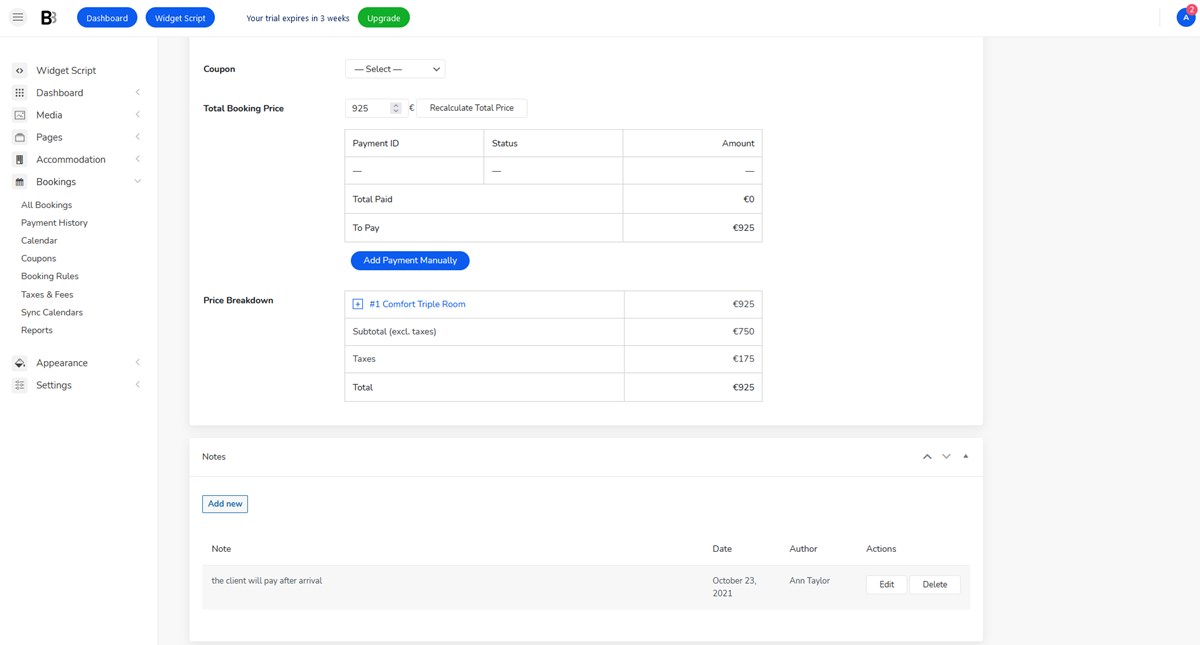
In a separate menu, there is an entire booking history and tools to work with each reservation. For example, you can edit bookings, add manual payments, switch rooms or change dates for current bookings, view payment history and more.
Subscription menu for the hotel booking form
Here you can manage your subscriptions, view how many days of a free plan is left, and upgrade it, too.
Compared to other vacation rental software providers, BNBForms offers affordable pricing plans when prices never rise depending on the number of rentals or bookings. That’s quite a difference!
Create and customize a powerful hotel booking form and widget for your website with BNBForms for free. If you have any questions about how the system works, don’t hesitate to visit our chat, write us an email or leave a comment.
Hello, I just started my trial and try to find where and how to add properties. Or is BNB Forms only for one single property?? Thanks
Hi, BNBForms service can be used to rent out multiple properties. Navigate to Accommodation > Accommodation Types and press a button Add Accommodation Type in the top right corner to add a new property type. Fill the form, choose services, booking rules and create rates for new accommodation type.