Google Analytics is a helpful tool for tracking various information about your website visitors, such as their devices and location. If you’re using the BNBForms booking widget, you may also want to learn about their booking behavior, for instance, how they make a booking.
Although a customer landing on a checkout page is not technically a confirmed booking, it can serve as an indicator of conversion. We’re here to help you to track it.
You send data from BNBForms to Google Analytics in four easy steps:
- Installing Google Analytics and Google Tag Manager.
- Sending data from the BNBForms iframe.
- Receiving data on your website.
- Setting up Google Tag Manager.
Installing Google Analytics and Google Tag Manager.
We assume Google Analytics and Google Tag Manager are installed on your website. If not, however, you need to create these accounts and install Google Tag and Google Tag Manager on your website. Use the links below.
Sending data from the BNBForms iframe.
First of all, let us provide you with a definition of an iframe by MDN:
The HTML Inline Frame element (<iframe>) represents a nested browsing context, embedding another HTML page into the current one.
That means inserting one webpage into another, BNBForms onto your website in our case, using an iframe element.
Whether you added BNBForms through a script or an iframe code, the booking form is always displayed within an iframe.
That means people browse the information in the widget and book an accommodation within the iframe then.
Our primary goal is to track the booking of a property by firing an event after the user reaches the confirmation page.
For this, we need to add a Javascript code to the confirmation page. The following Javascript code is provided for your reference only.
You do not need to add it as we have already done so for you.
<script>
(function(window) {
  try {
    var postObject = JSON.stringify({
      event: 'begin_checkout'
    });
    parent.postMessage(postObject, '*');
  } catch(e) {
    window.console && window.console.log(e);
  }
})(window);
</script>
To establish communication between the iframe and the page on your website where it is embedded, we utilize the postMessage() method.
The window.postMessage() method safely enables cross-origin communication between Window objects; e.g., between a page and a pop-up that it spawned, or between a page and an iframe embedded within it.
Following the Google Analytics docs, we use Google Tag with the ‘begin_checkout’ event to transmit the collected data.
On your site but outside of an iframe we have to insert another script as described in the next step.
Receiving data on your website.
When the user navigates to the checkout page, the message is sent and now we have to ‘listen’ to it on your website using the following code:
<script type="text/javascript">
(function(window) {
addEvent(window, 'message', function(message) {
try{
var data = JSON.parse(message.data);
var dataLayer = window.dataLayer || (window.dataLayer = []);
if (data.event) {
dataLayer.push({
'event': data.event,
});
}
} catch(e) {}
});
// Cross-browser event listener
function addEvent(el, evt, fn) {
if (el.addEventListener) {
el.addEventListener(evt, fn);
} else if (el.attachEvent) {
el.attachEvent('on' + evt, function(evt) {
fn.call(el, evt);
});
} else if (typeof el['on' + evt] === 'undefined' || el['on' + evt] === null) {
el['on' + evt] = function(evt) {
fn.call(el, evt);
};
}
}
})(window);
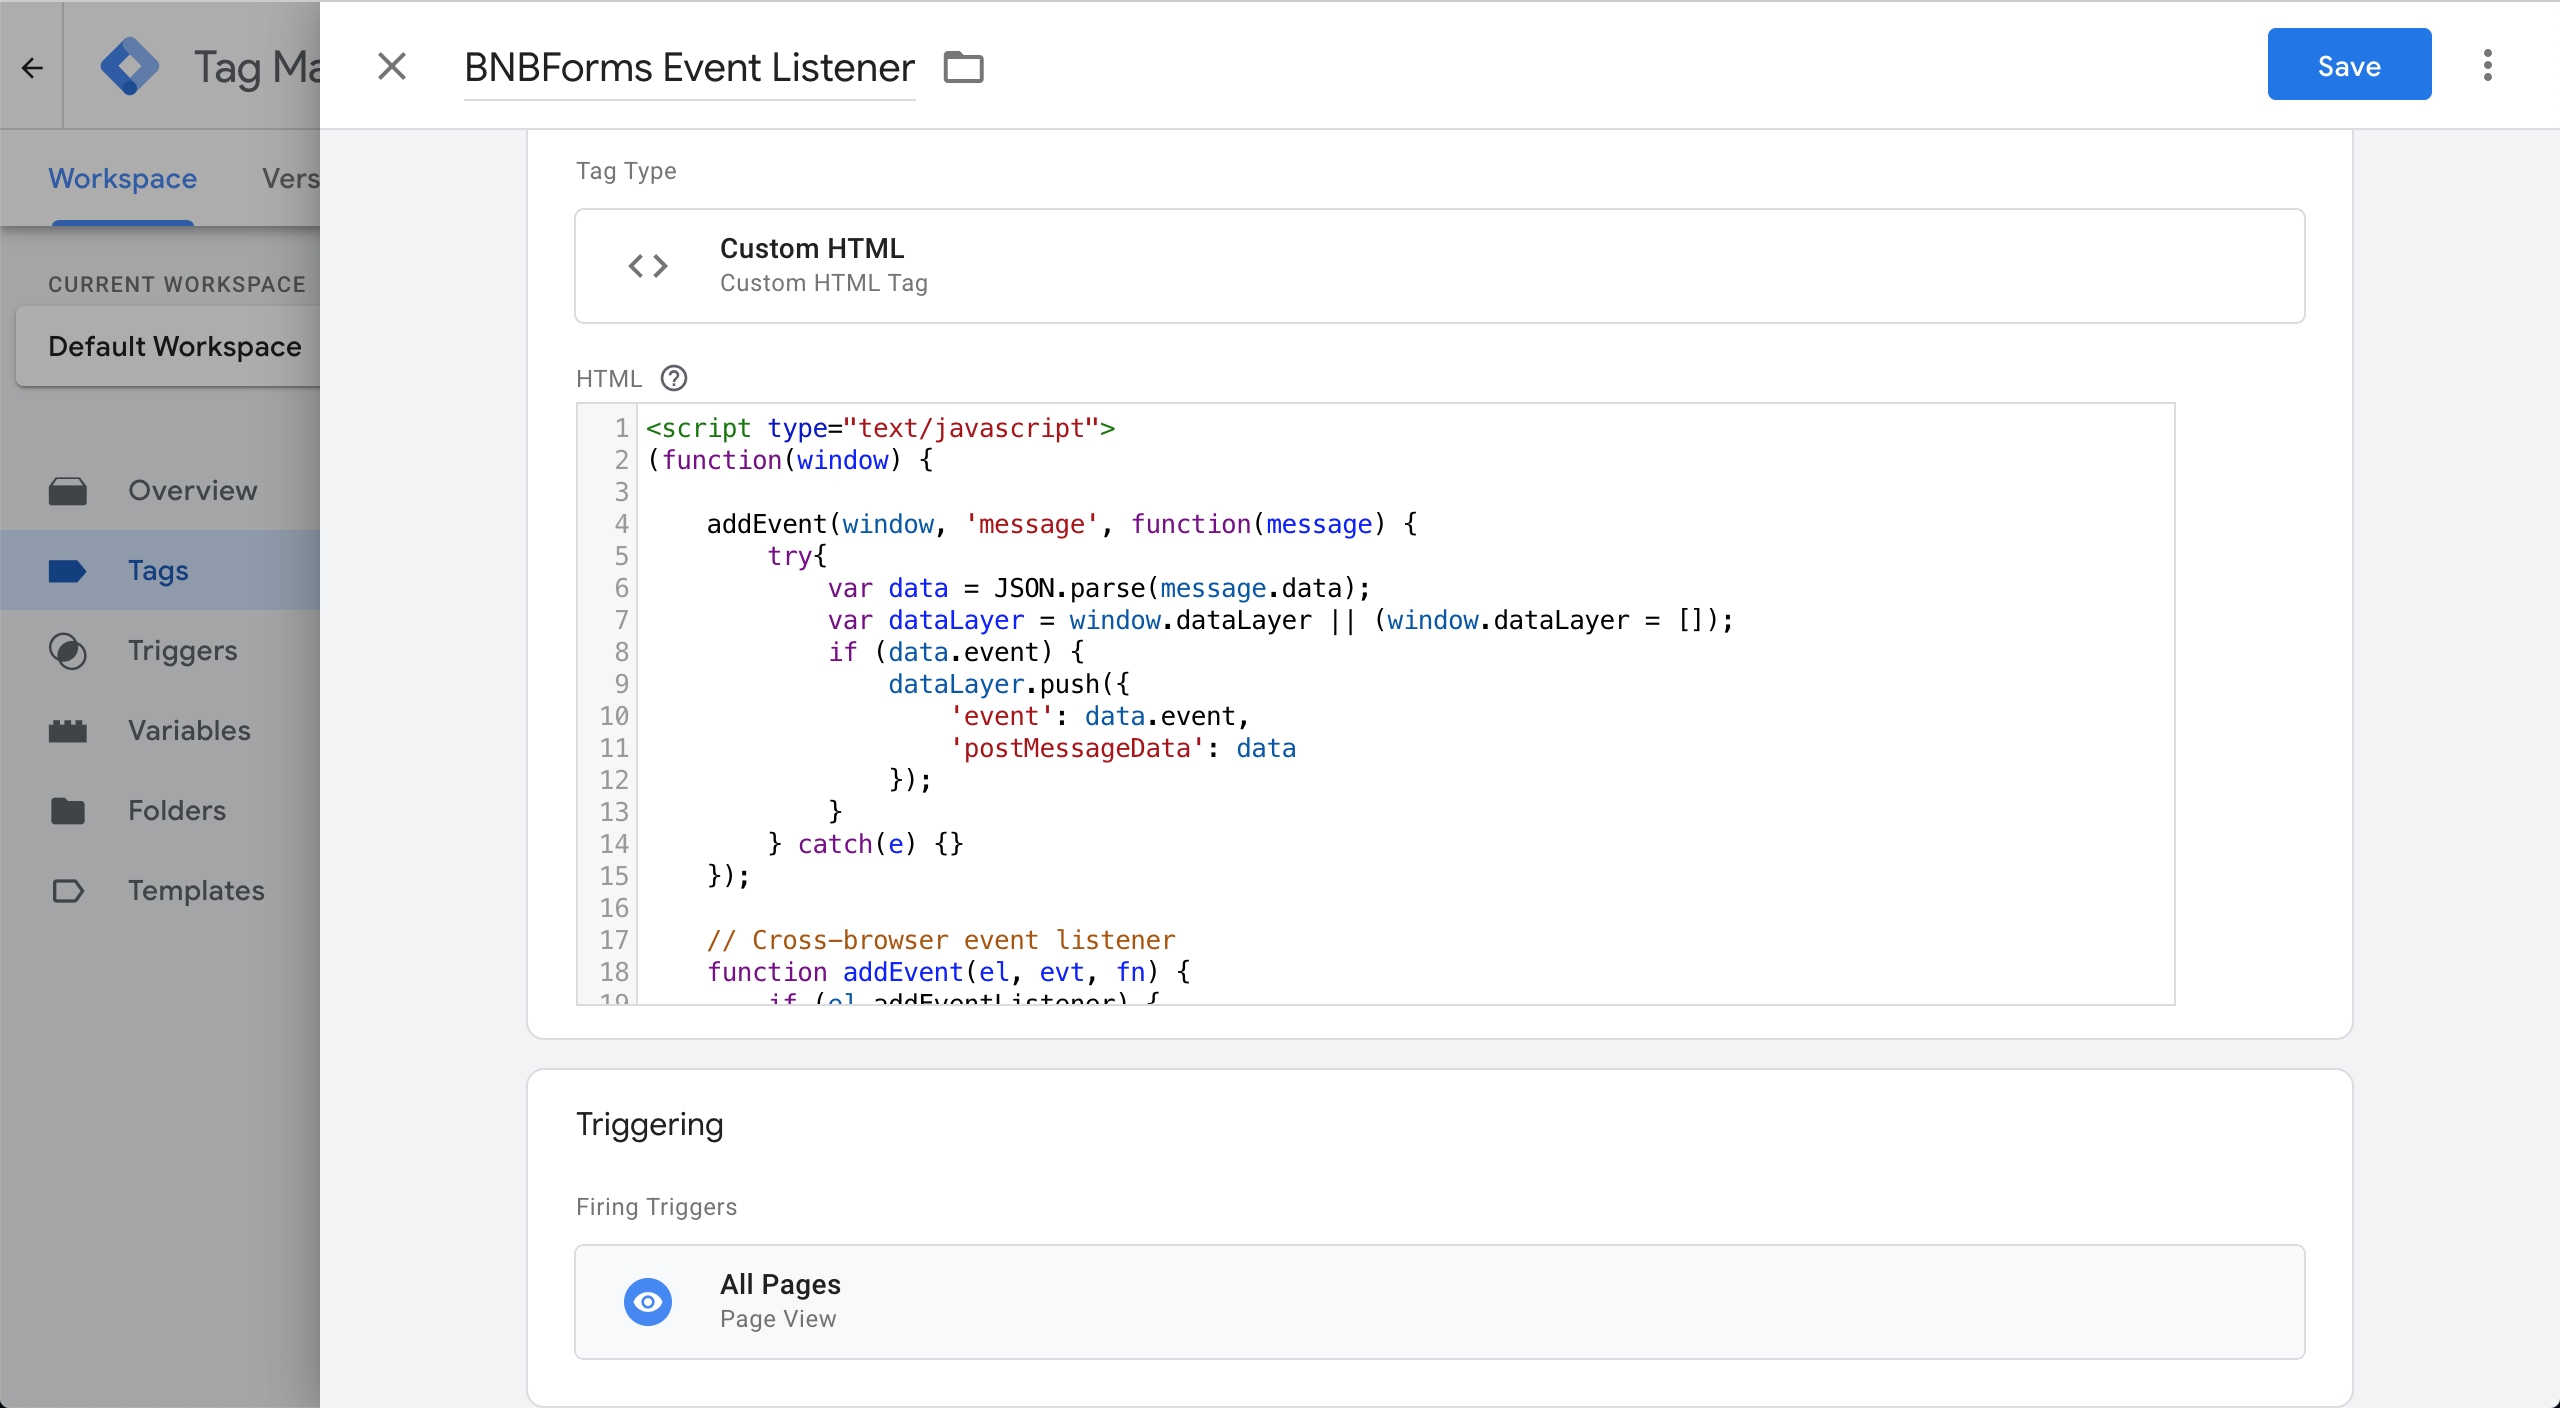
</script>You can add this code to your website manually or with Google Tag Manager.
To add the code with Google Tag Manager do the following:
- Navigate to Google Tag Manager associated with your website.
- Navigate to Tags.
- Click New on the right side of the screen.
- Click on the Tag Configuration area.
- Scroll down to the Custom section and select the Custom HTML tag.
- Paste the code above to the HTML area.
- Scroll down and click on the Triggering area.
- Choose All Pages.
- Scroll up and name the tag. For example: BNBForms Event Listener.
- Click Save.
Setting up Google Tag Manager.
Sending data to Google Analytics.
Currently, it is not possible to view any events triggered in Google Analytics. To do so, we must configure them in Google Tag Manager.
Triggers
Go to Triggers, click New. In the popup, click on the Trigger Configuration area.
Scroll down and choose Custom Event.
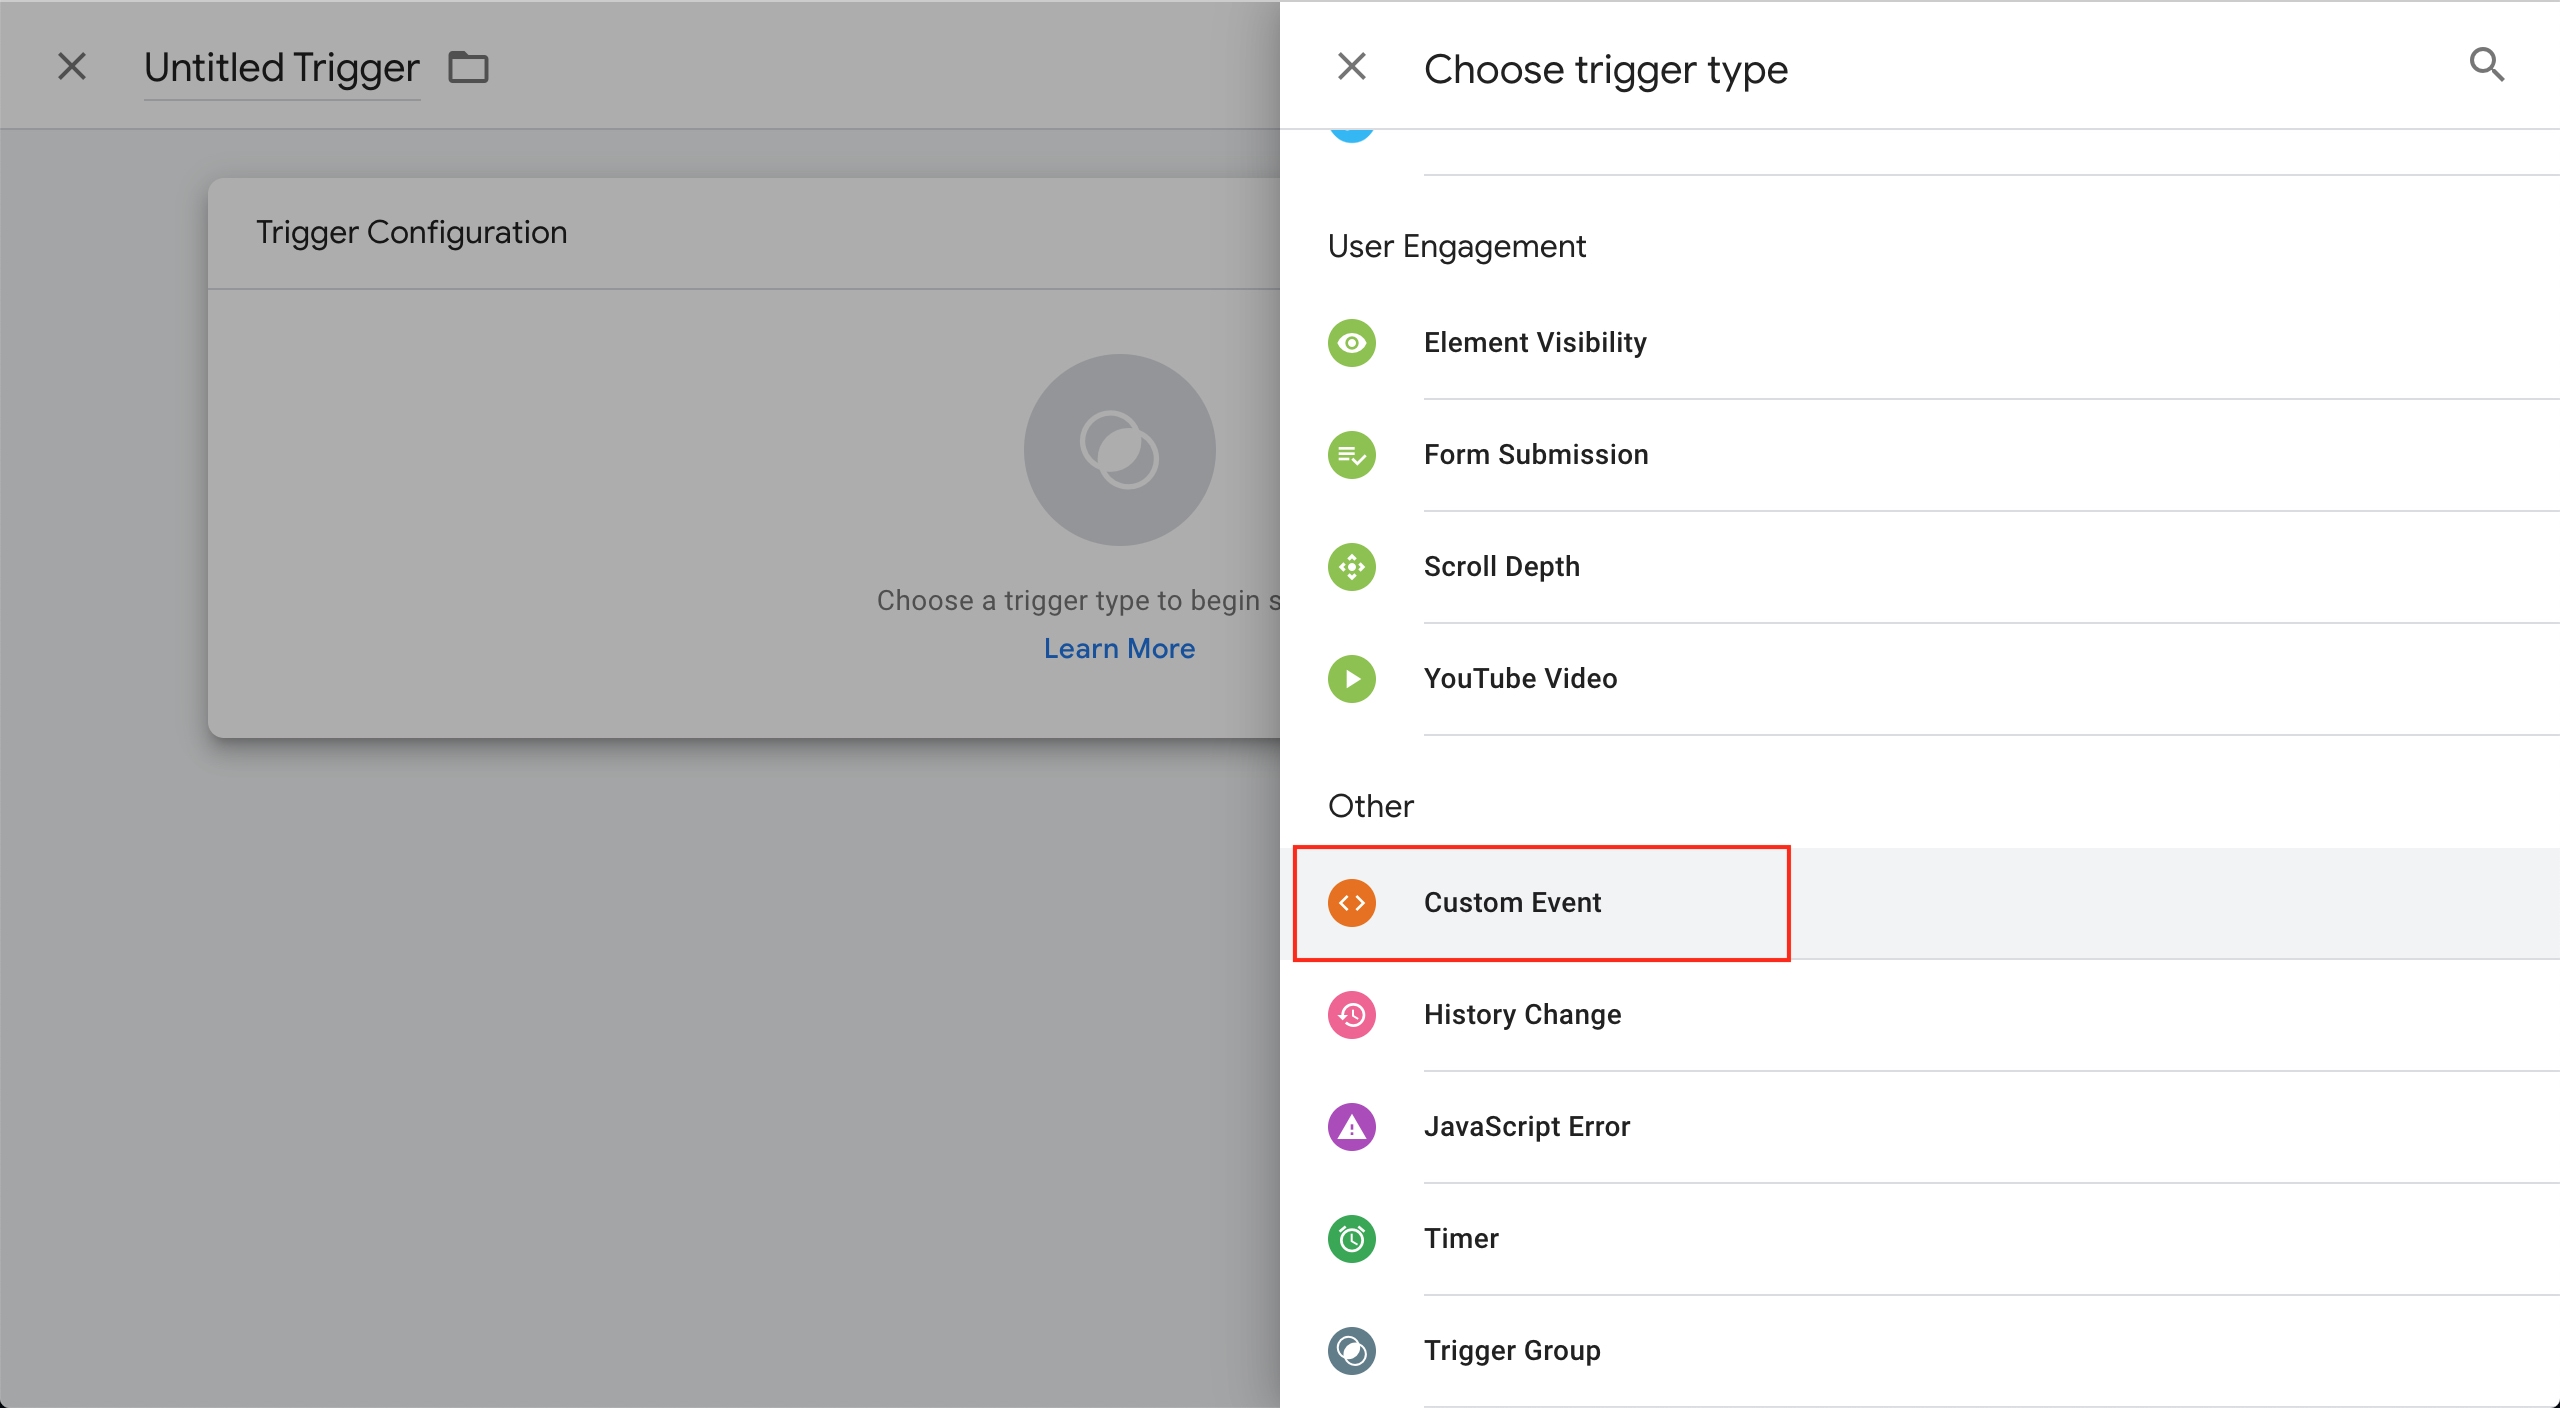
Paste begin_checkout in the Custom Event field.
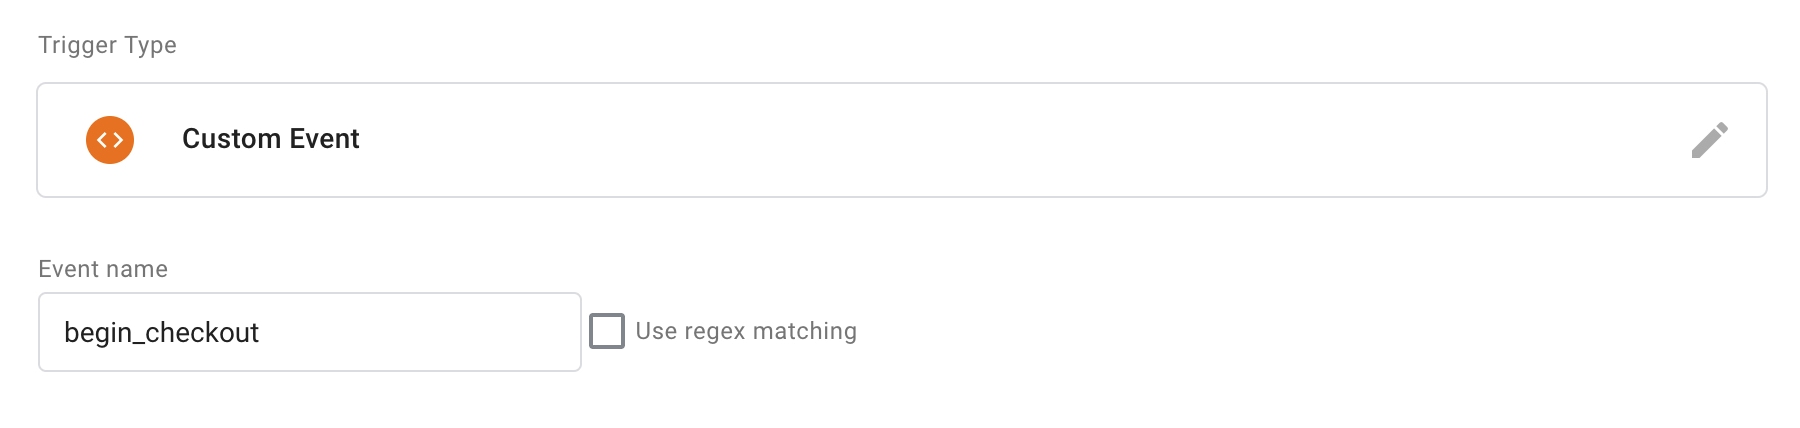
Name the trigger, for example, Begin Checkout Trigger, and save it.
Tags
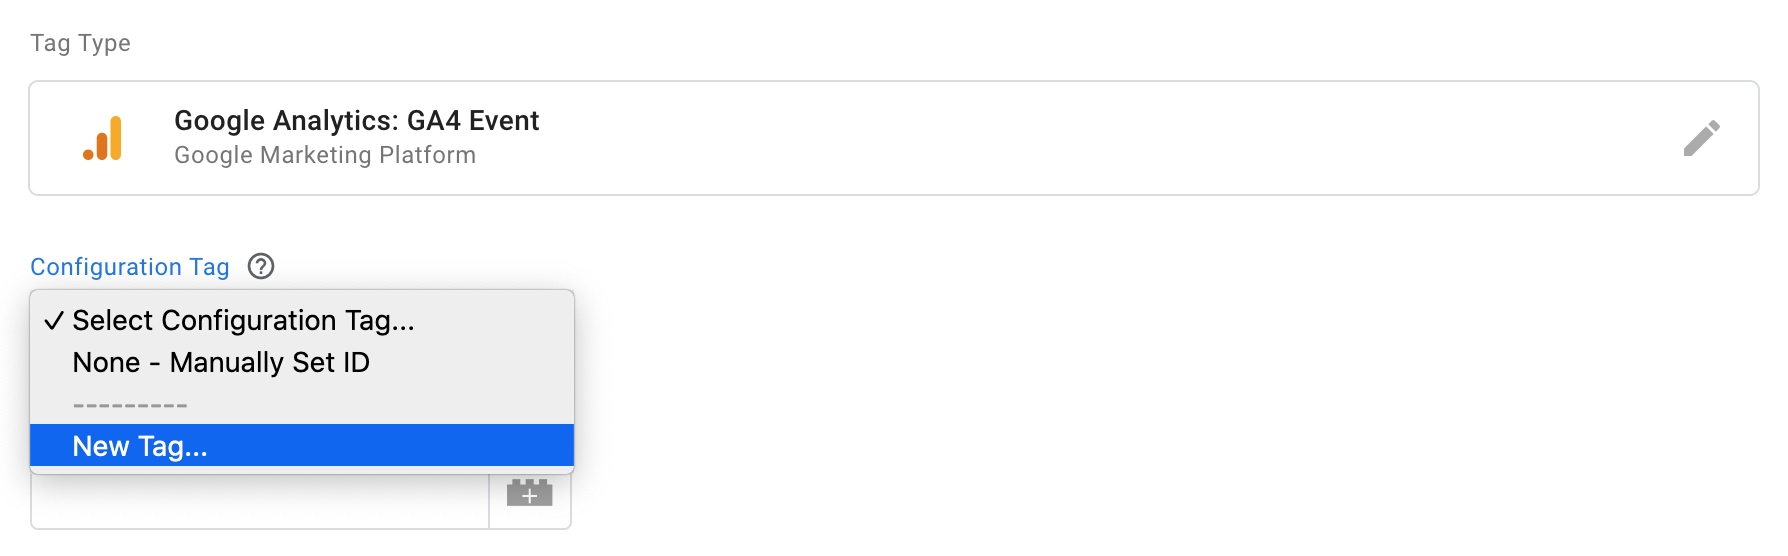
Go to Tags, click New and choose Google Analytics: GA4 Event.
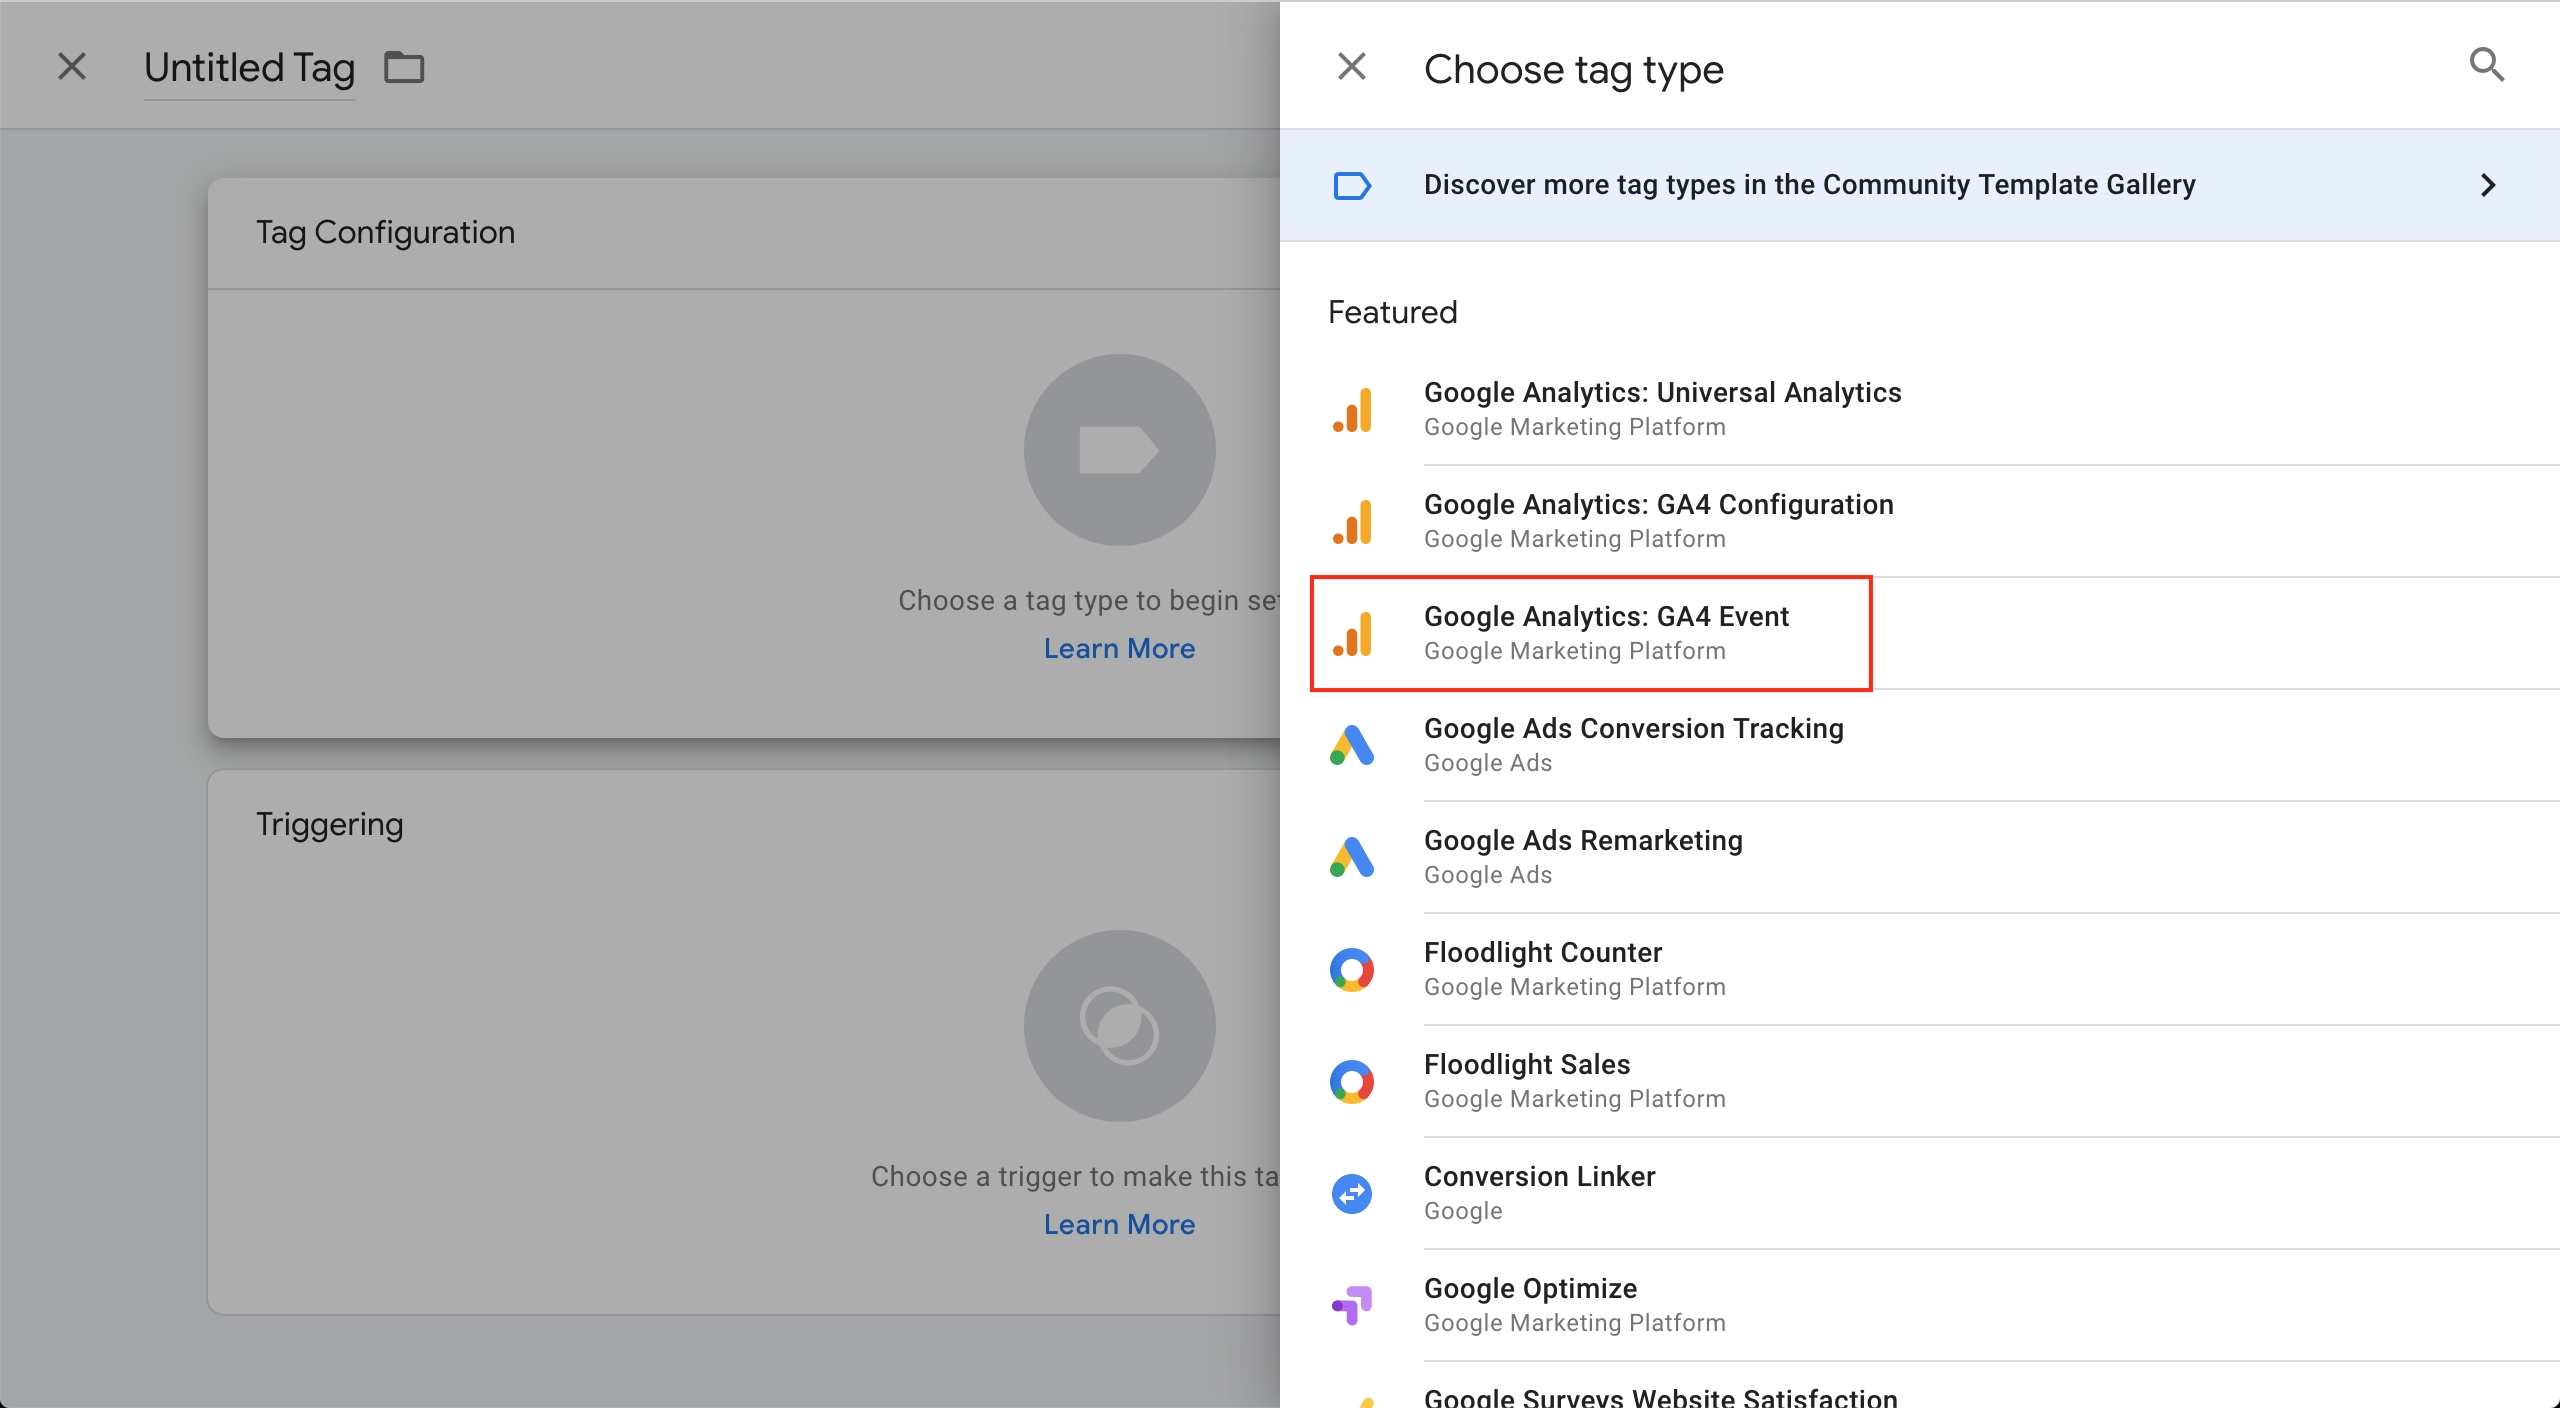
In Configuration Tag, select New Tag
Paste your Google Tag ID in the Measurement ID field and deselect the “Send a page view event when this configuration loads” option.
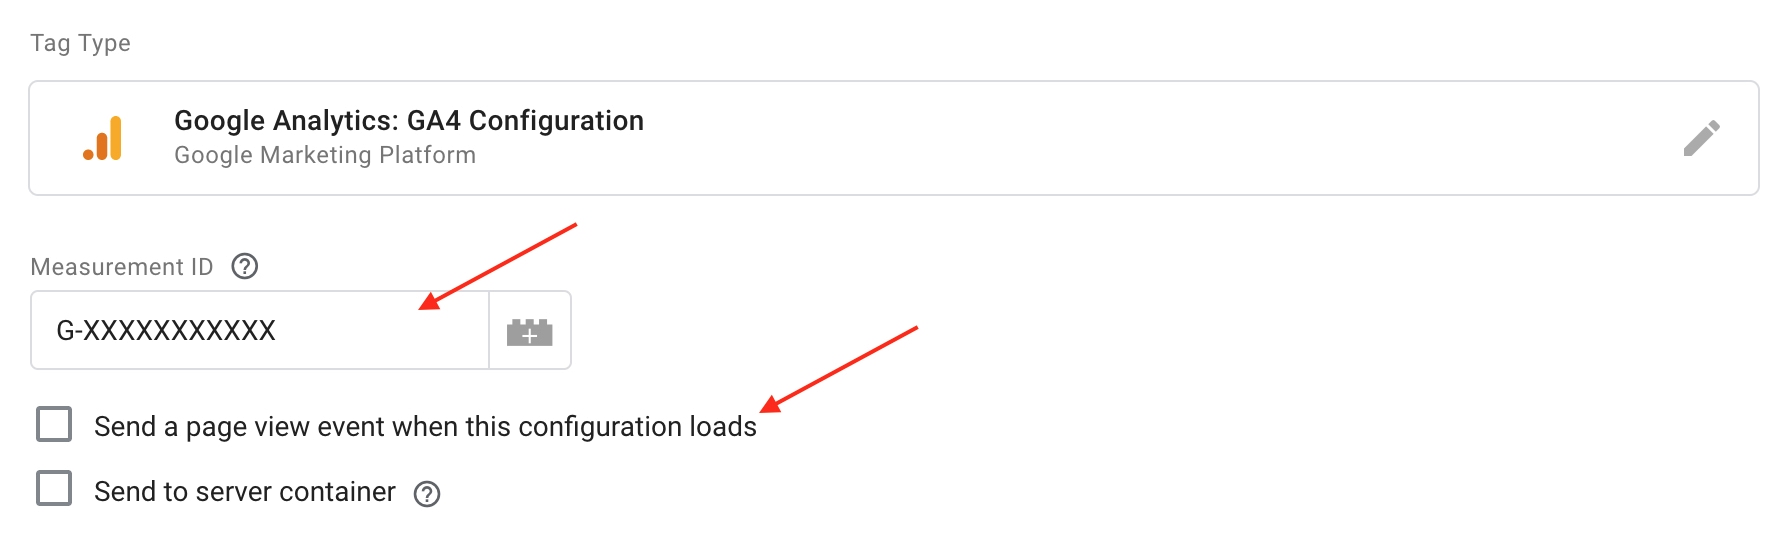
Name the tag and save it.
Paste begin_checkout in the Event Name field.
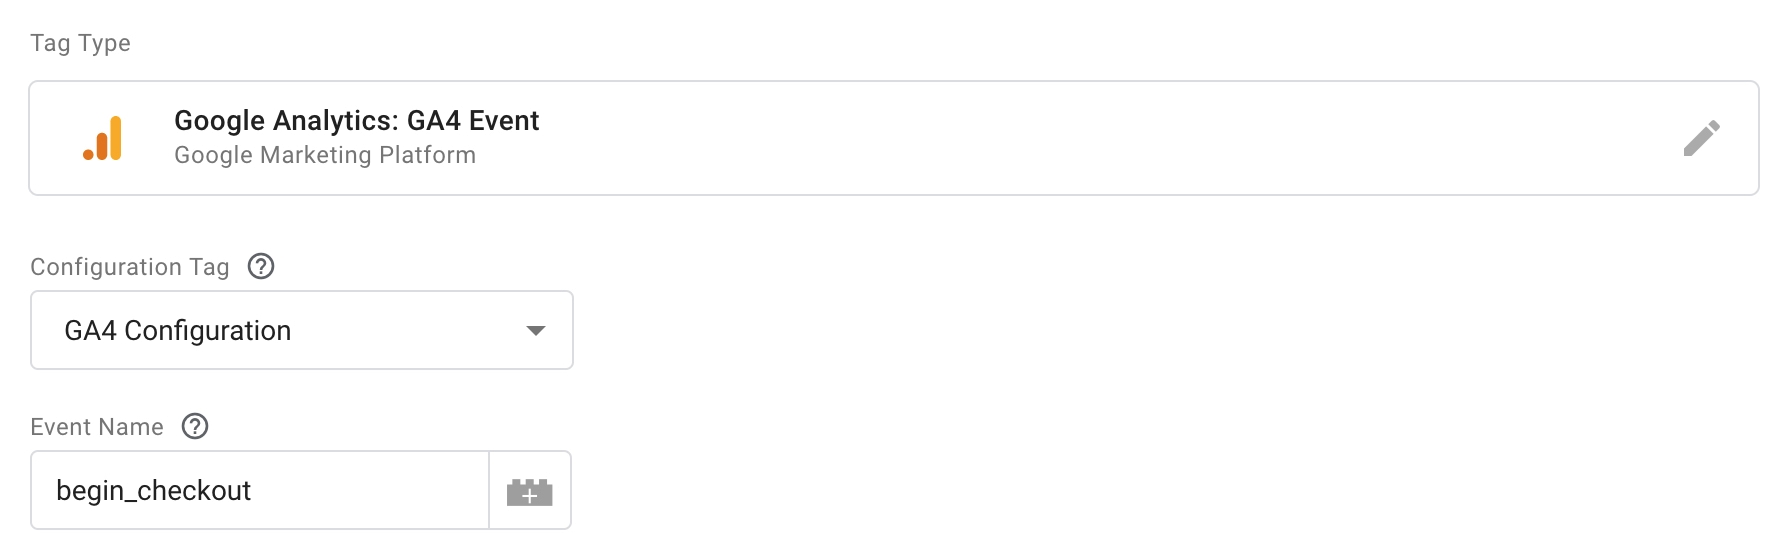
Scroll down and click on the Triggering section.
Choose the Begin Checkout Trigger we’ve created in the previous step.
Name the tag and save it.
Press Submit and Publish to apply changes.
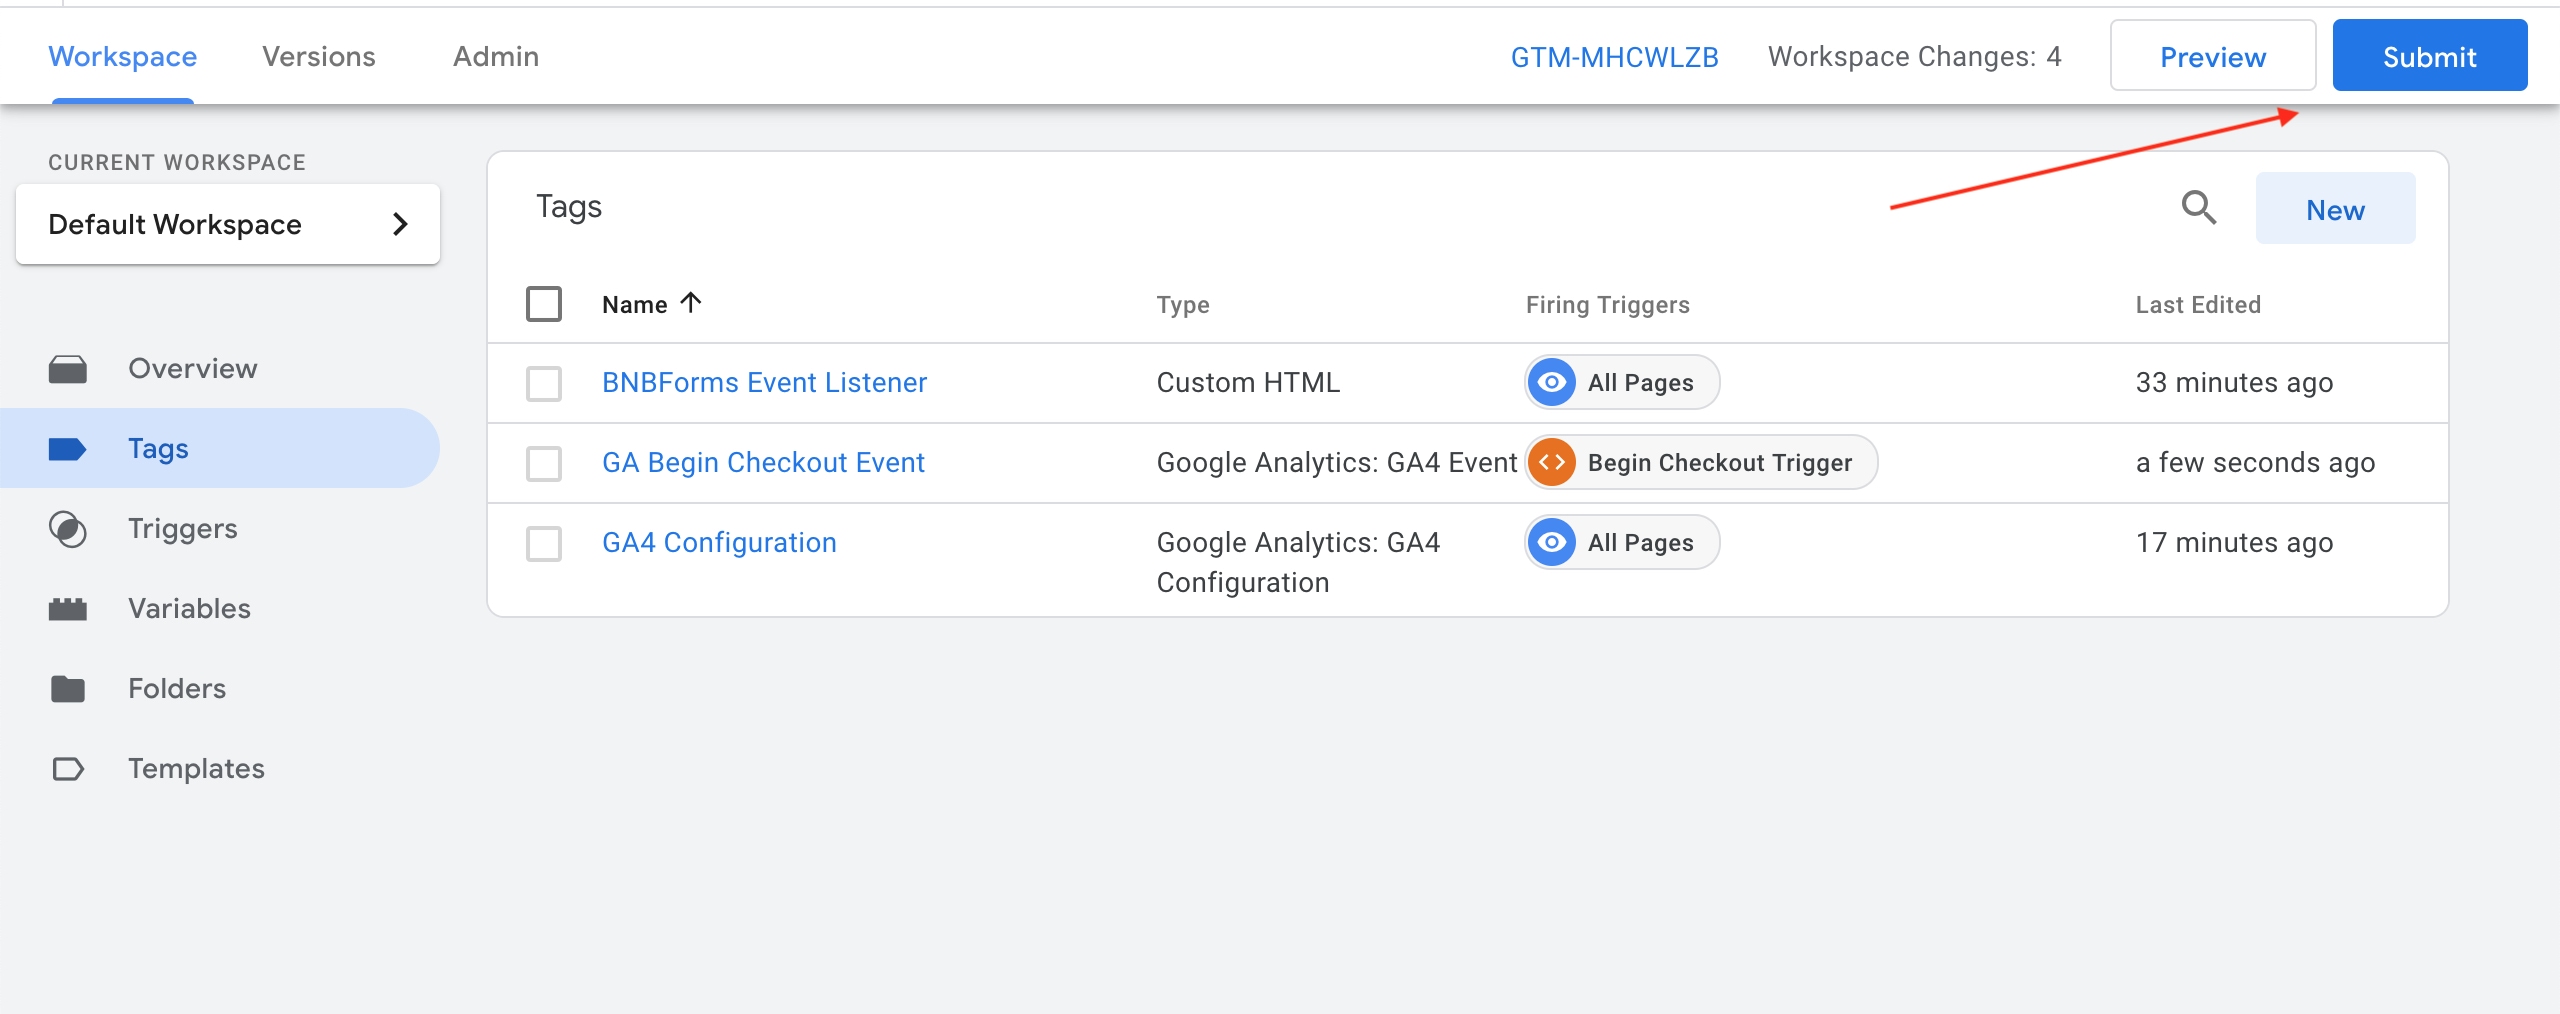
You may click the Preview button to test Tags:
- Open your website in the debug mode.
- Open the BNBForms widget and navigate to checkout.
- Switch back to the Tag Assistant tab.
- You will find the begin_checkout event in the list.
You may open Google Analytics > Reports > Realtime report. The begin_checkout event should appear in the list of events.
Sending data to Google Ads.
Tags
Go to Google Tag Manager > Tags and click New.
In the Tag type, choose Google Ads Conversion Tracking.
If you see the “Conversion Linker tag missing in container.” message, click Create. Name the tag and save it.
Go to you Google Ads account in a new tab https://ads.google.com/
In the top menu, click Tools and settings, Measurement, Conversions.
Click New conversion action, Website.
Insert your website domain and click Scan.
Scroll down and click Add a conversion action manually.
Fill the form and press Done.
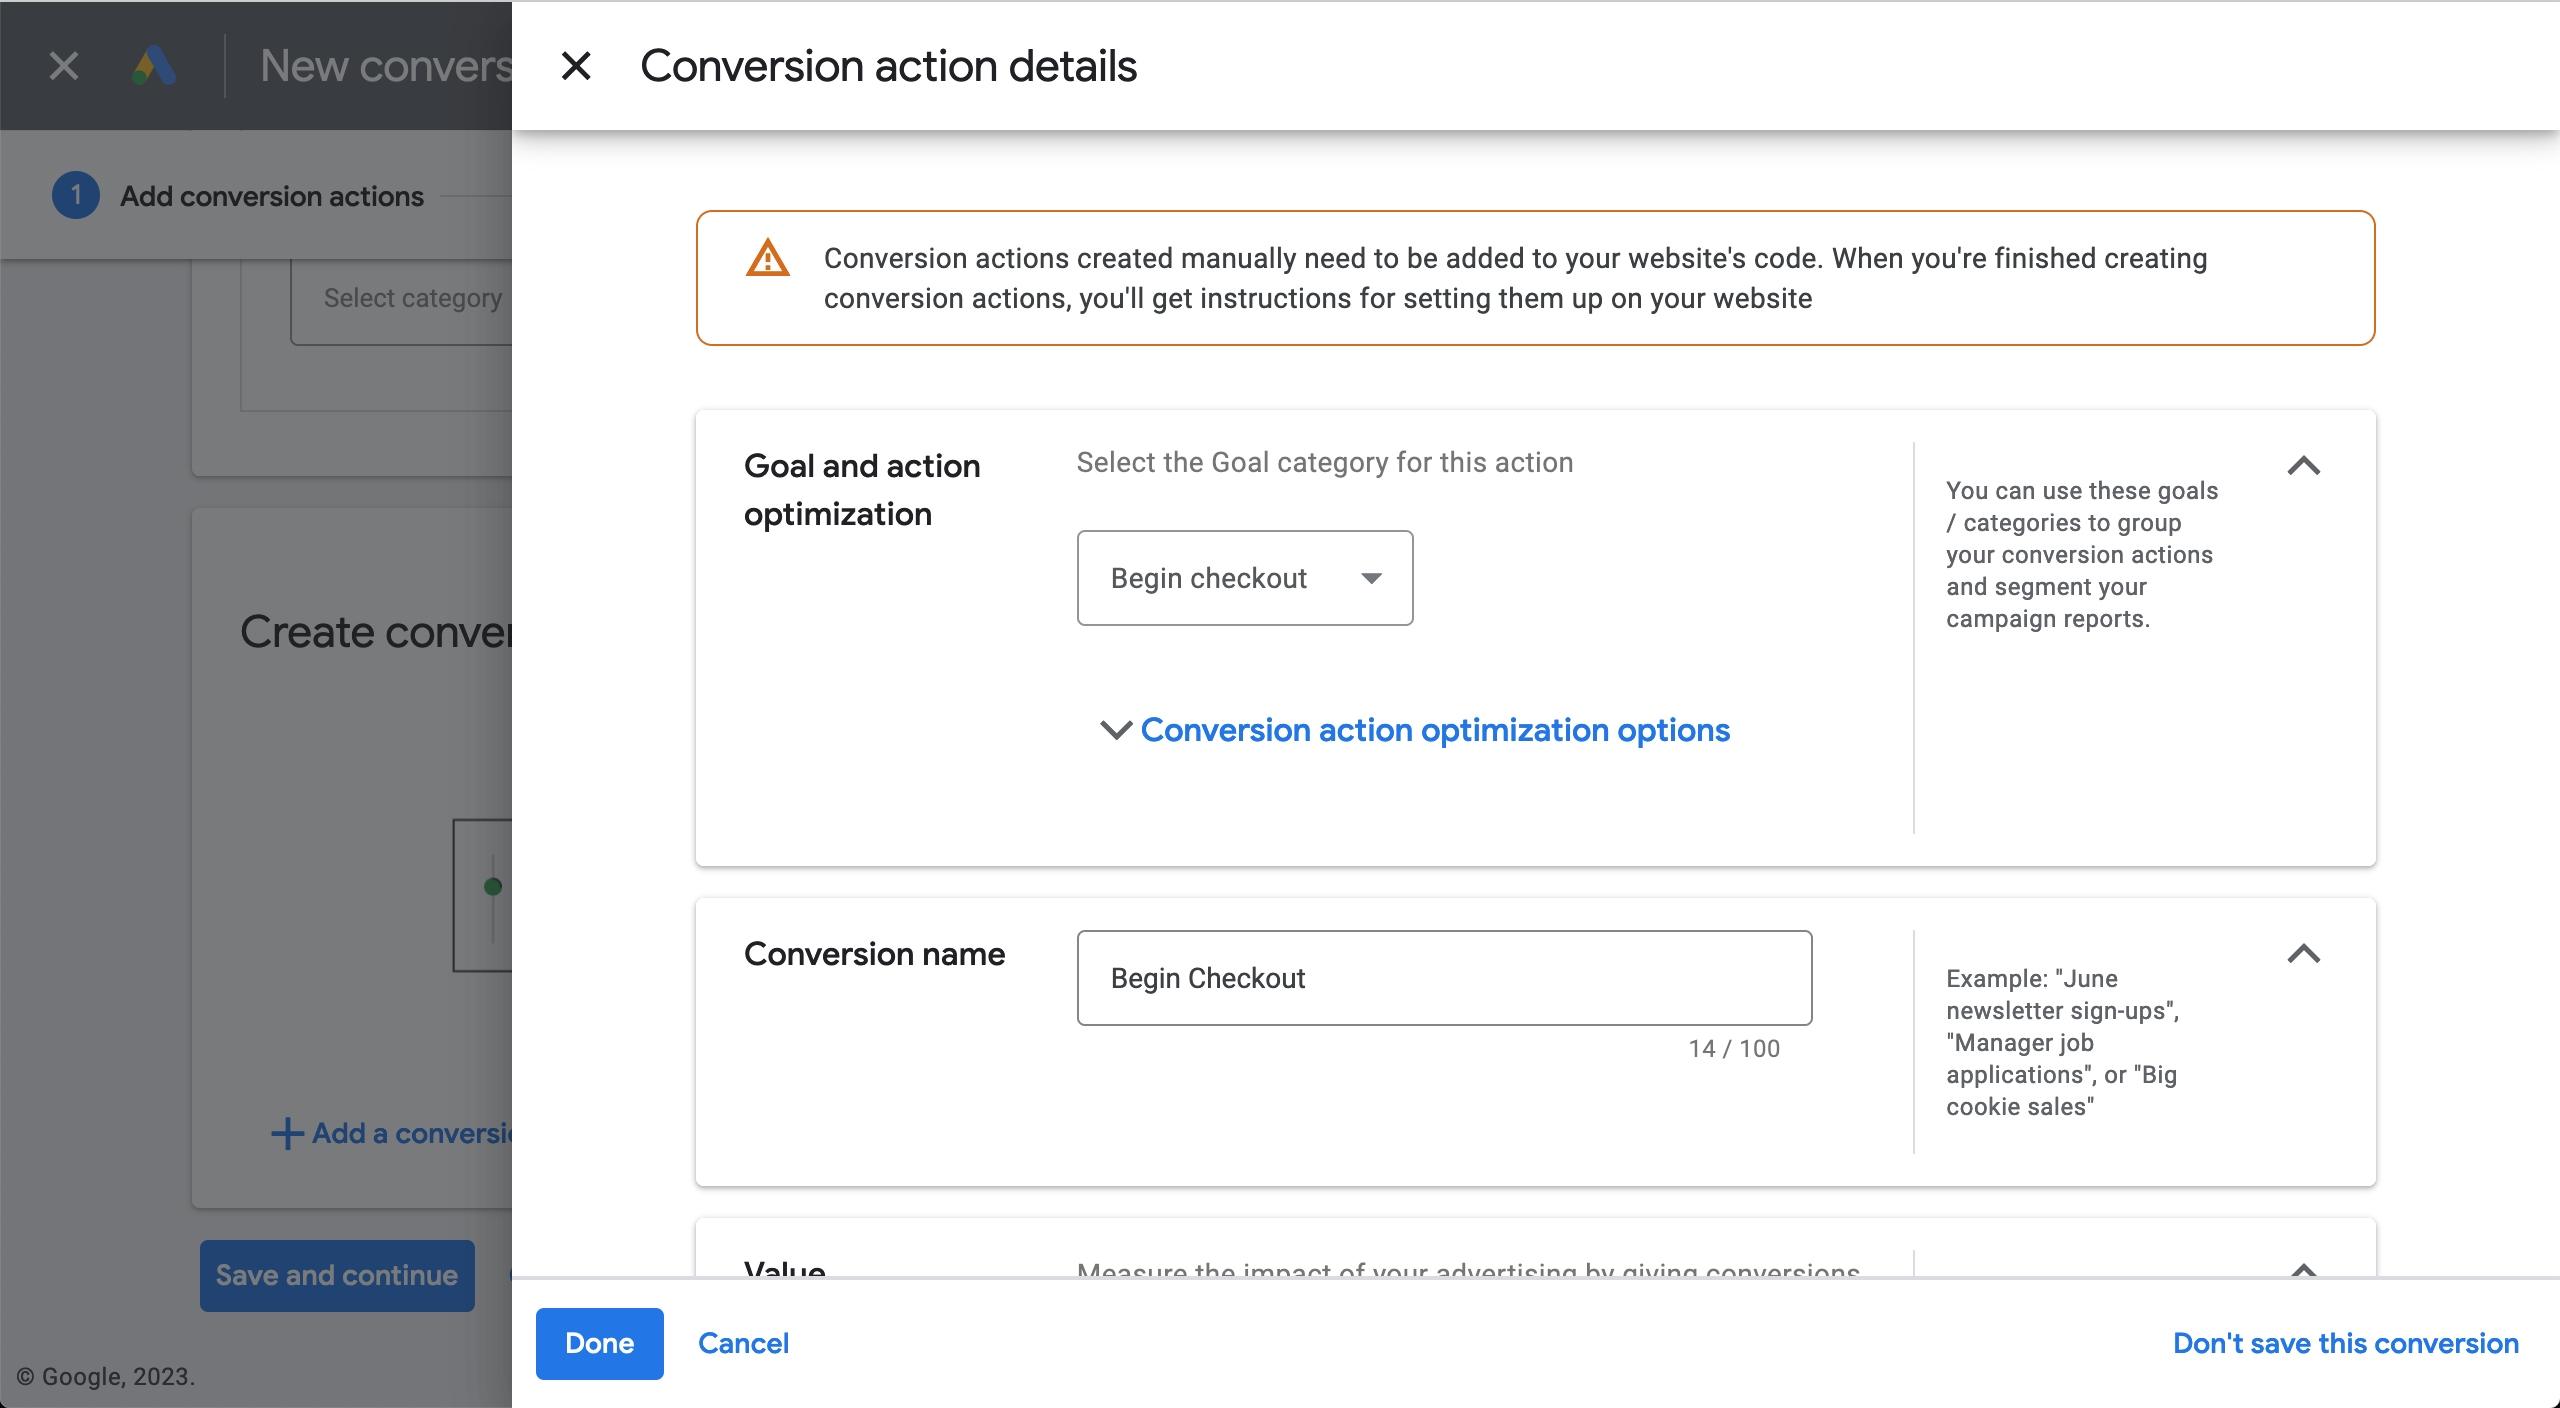
Click Save and continue.
On the Instructions section, click the Google Tag Manager tab.
Copy Conversion ID and Conversion Label, switch back to Google Tag Manager and paste them into the relevant fields.
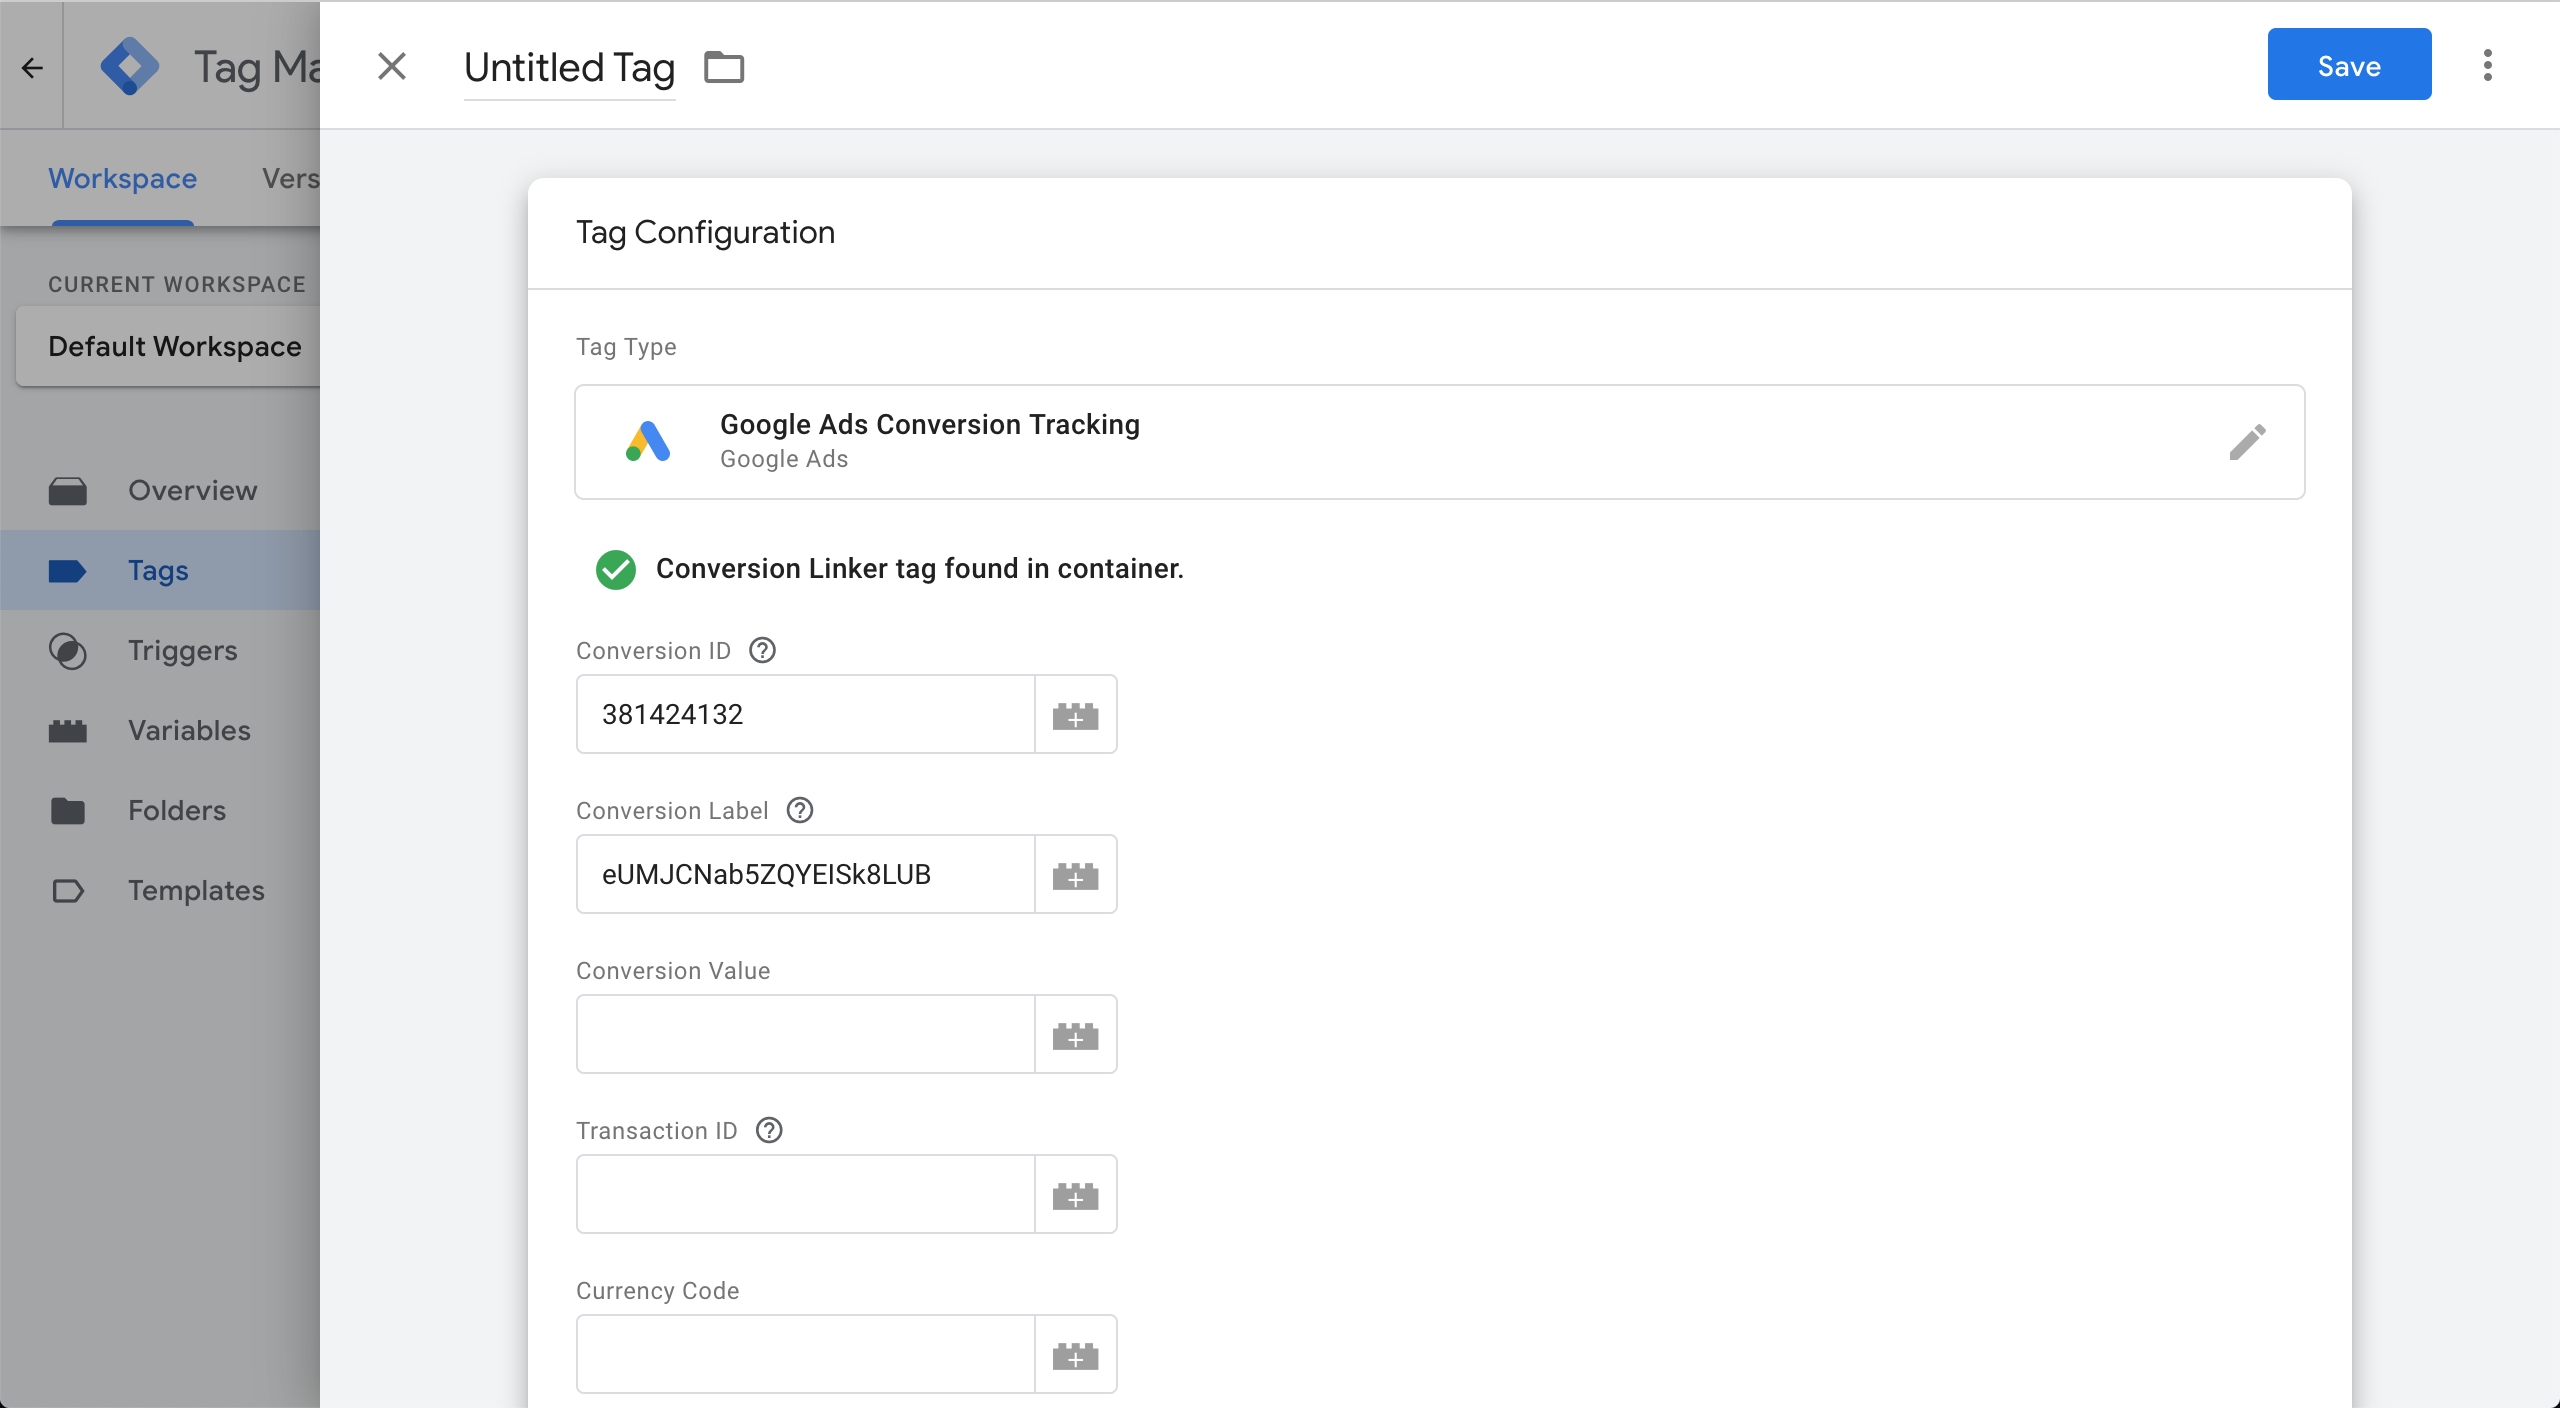
Return to Google Ads and press Done.
In the Google Tag Manager, scroll down to the Triggering section and click it.
Select the Begin Checkout Trigger we’ve created in the previous step.
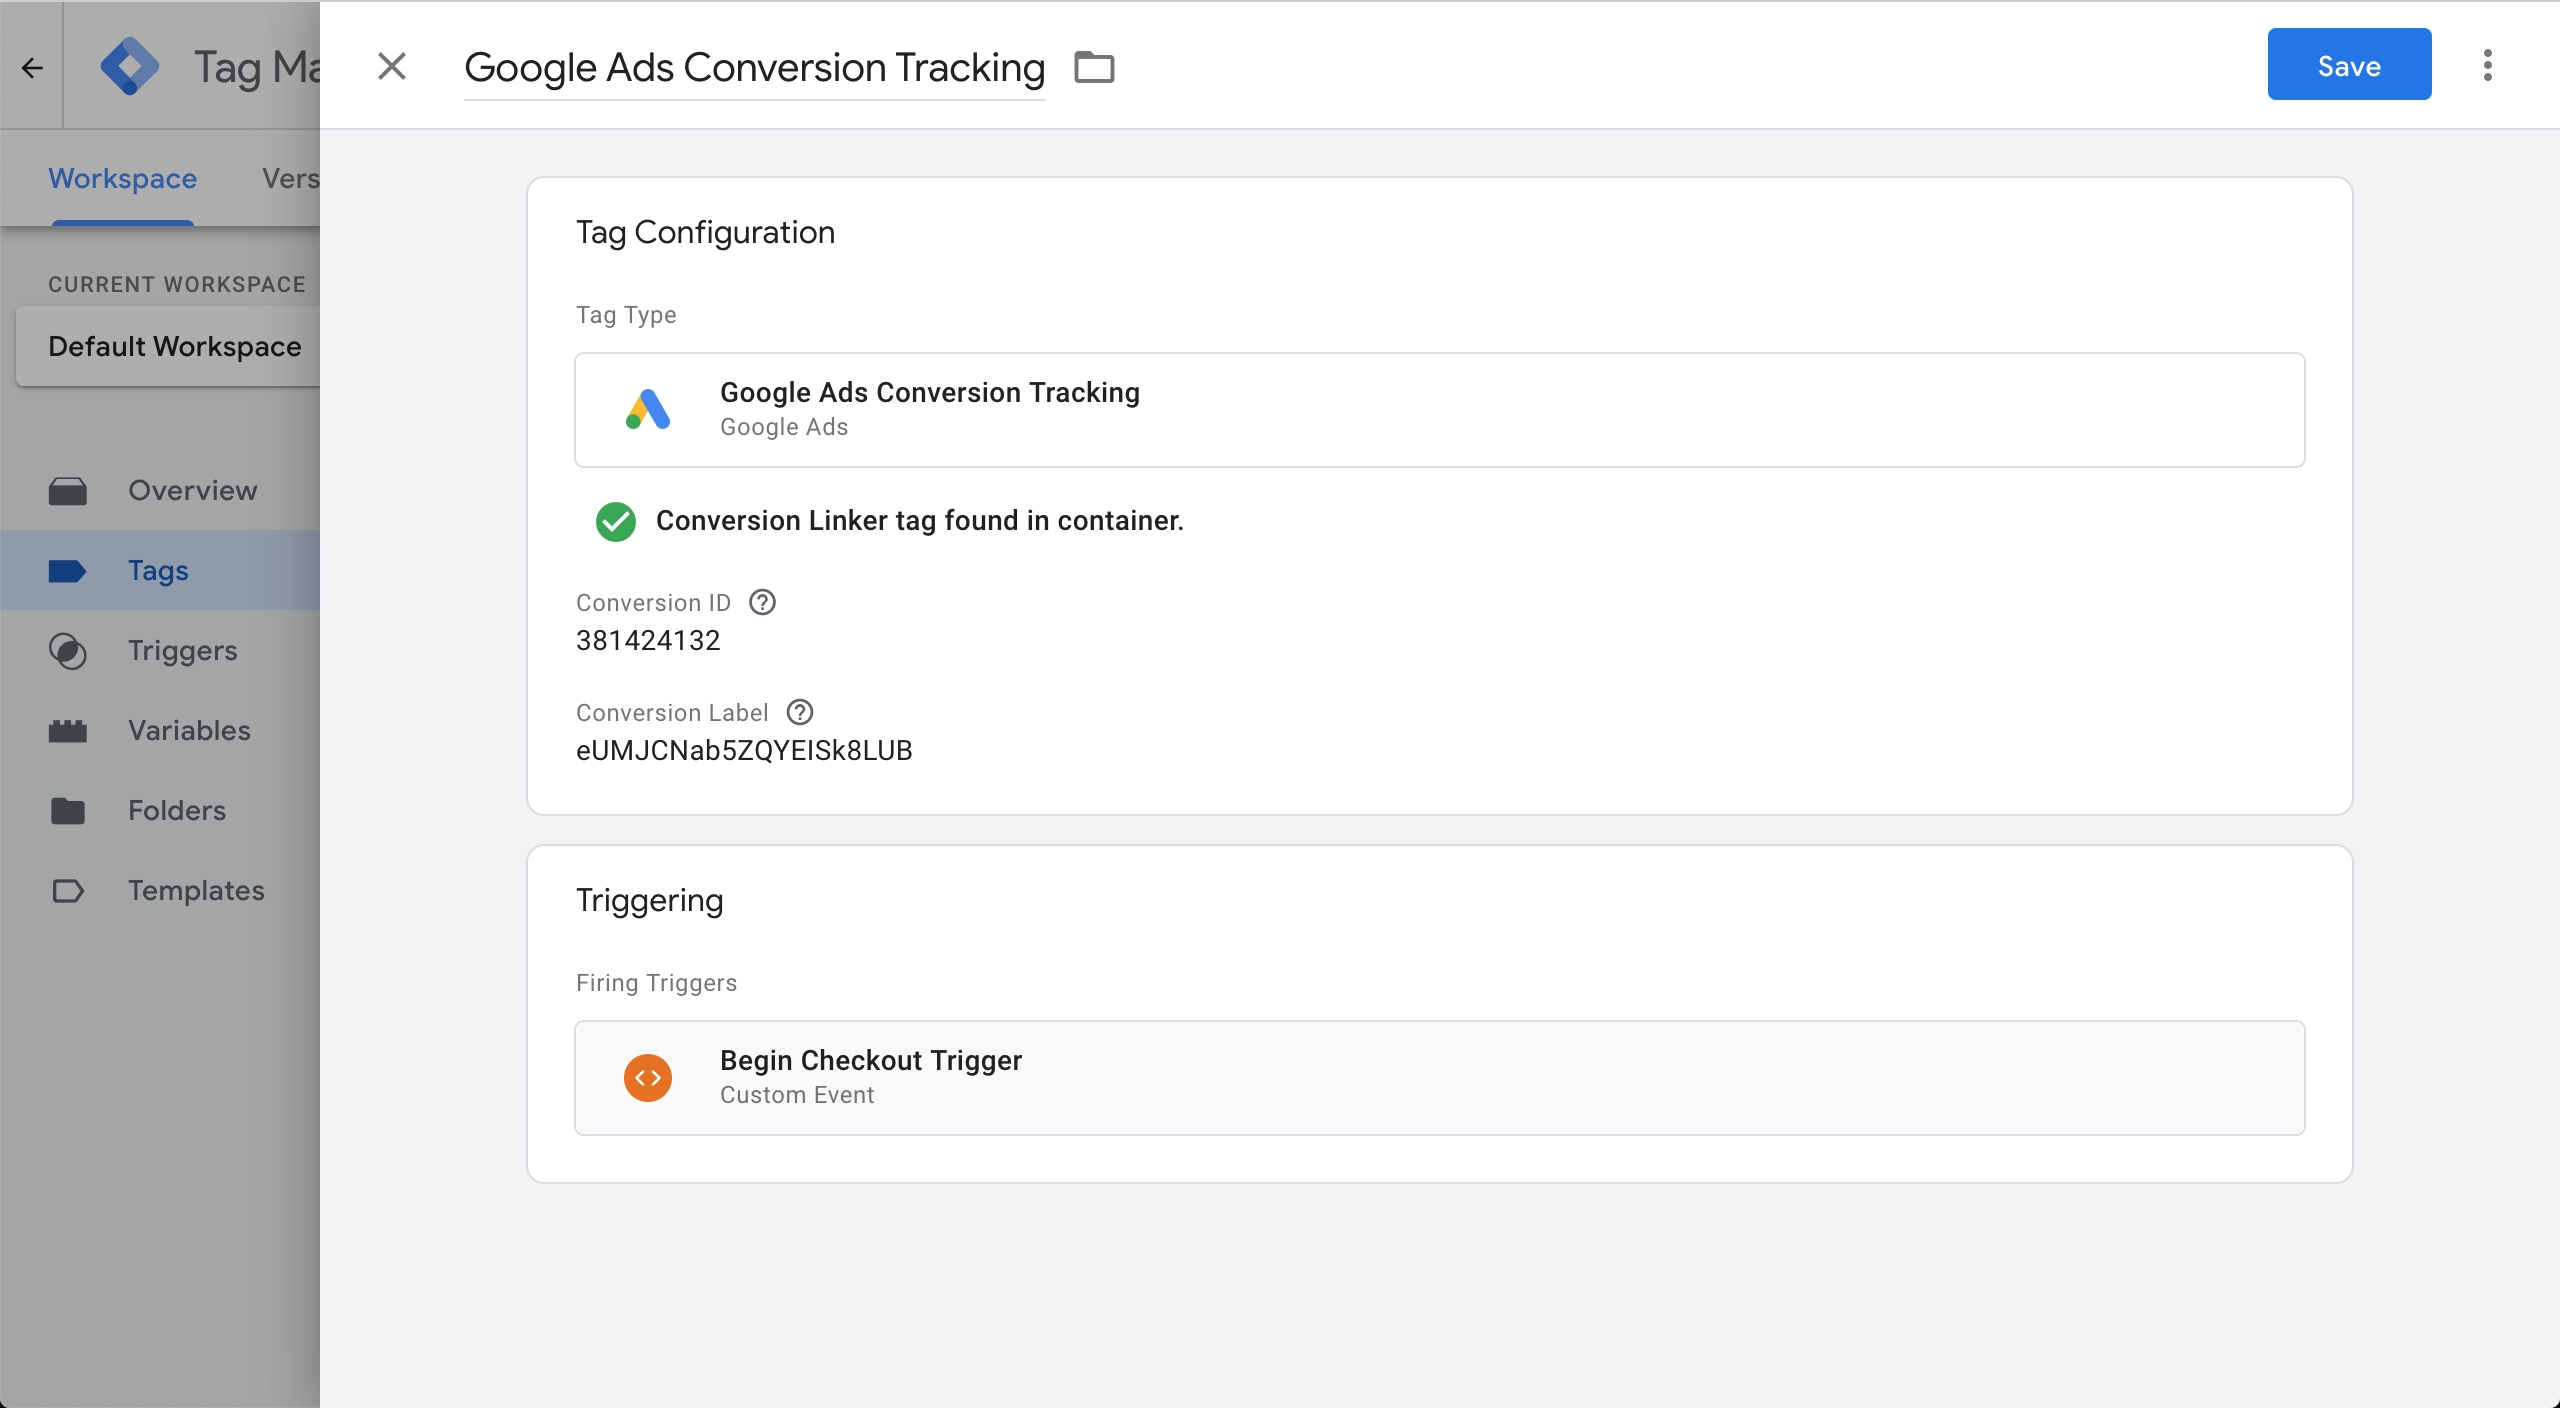
Name the tag and save it.
Press Submit and Publish to apply changes.
Revision: 1. Updated Mar 30, 2023